
Switching from Webflow to WordPress is a common move for individuals and businesses seeking greater control, flexibility, and long-term scalability. While Webflow offers a sleek design interface and all-in-one hosting, WordPress continues to dominate as the world’s most versatile content management system. If you’re ready to make the transition, this guide will walk you through the entire migration process, step by step ensuring a smooth and secure transfer.
Key Takeaway:
To migrate from Webflow to WordPress, export your CMS content as CSV files from Webflow and import them into WordPress using the WP All Import plugin. Configure permalinks to match your original URLs and update DNS settings to point your domain to the new WordPress site.
Understanding the Differences Between Webflow and WordPress
Webflow is a visual website builder that combines design and hosting in a single platform. It’s a closed system, meaning you’re tied to its infrastructure, CMS, and pricing model. WordPress, on the other hand, is an open-source platform that gives you full ownership of your site and data. It requires separate hosting but provides far more control over design, functionality, and long-term customization.
WordPress also has a much broader plugin ecosystem, making it ideal for growing websites that need advanced features without custom development. Many users migrate to WordPress when they realize they want full freedom to scale their site, integrate third-party tools, or reduce ongoing platform fees.
Step 1: Back Up Your Webflow Website
Before making any changes, it’s crucial to back up your entire Webflow site. Webflow doesn’t offer a one-click backup or export for dynamic CMS content, so you’ll need to download your static assets manually. Export the HTML, CSS, JavaScript, and images from each page. For dynamic content like blog posts or collections, copy the data into a spreadsheet or document to ensure nothing is lost. If your site uses custom scripts or form settings, note those down for later reconfiguration.
Step 2: Set Up Your WordPress Site
Before importing any content, you’ll need a WordPress environment ready to build on. Choose a hosting provider that supports WordPress efficiently, ideally with features that save you setup time and reduce technical overhead.
If you want a streamlined experience, consider using our Managed WordPress hosting, which comes with WordPress pre-installed, lightning-fast performance, and built-in security. Every plan includes daily backups and free migration, making it an ideal starting point for a clean, worry-free transition from Webflow.
Once your hosting is in place, we recommend setting up a staging environment, a private copy of your site where you can test changes safely check out our guide on how to set up a staging. After setup, log in to your WordPress dashboard and take a moment to familiarize yourself with the layout, tools, and content structure. This is where you’ll rebuild and refine your website for launch.
Step 3: Export Content From Webflow
To move your content from Webflow to WordPress, focus on exporting your dynamic CMS data such as blog posts, project entries, or collections. Follow these steps:
1. Log in to Your Webflow Dashboard: Open the project you’re migrating. Ensure that your content is clean, updated, and ready to be transferred.
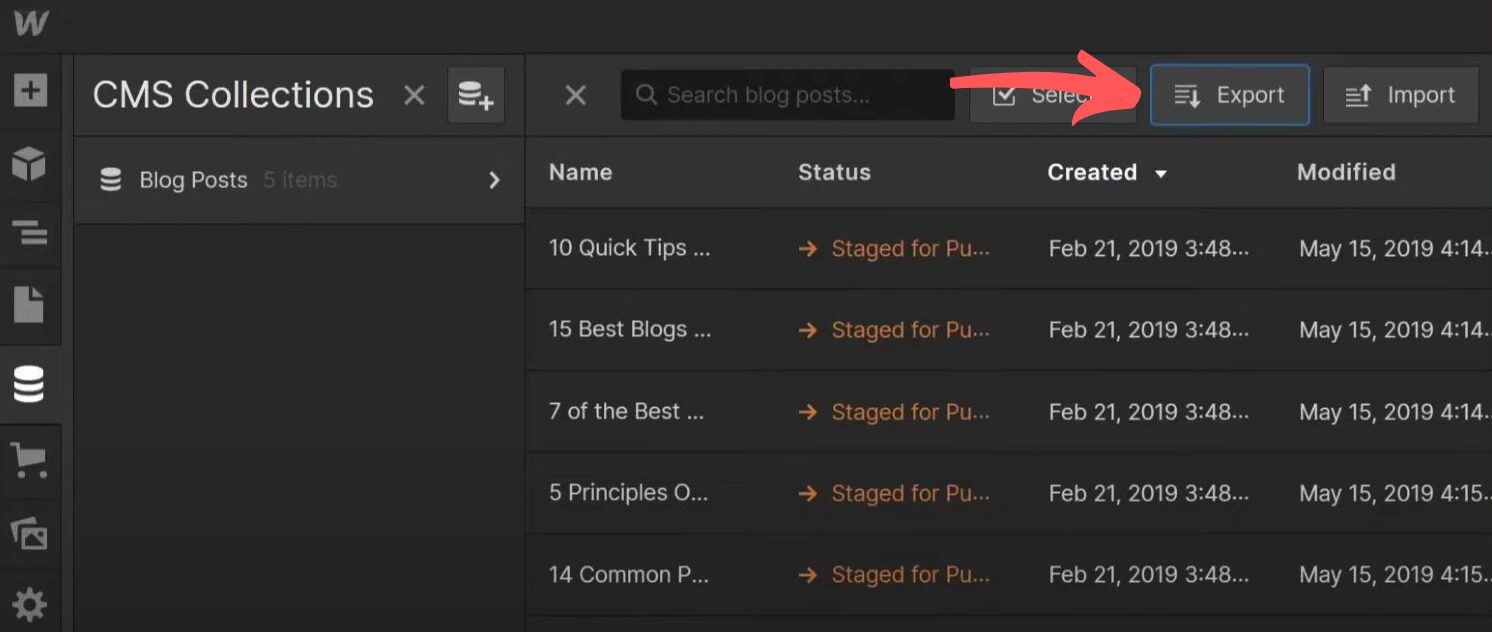
2. Export CMS Collections as CSV Files: Navigate to the Collections panel inside the Webflow Designer. Select the collection you want to export for example, blog posts or case studies. Click the settings (gear) icon in the top-right corner, then choose Export as CSV. This will download a spreadsheet containing your content. Repeat this process for each collection you want to move.
3. Document Forms and Custom Scripts: Webflow forms and any embedded scripts are not included in the CSV export. Manually copy your form fields, confirmation messages, and any custom code snippets so you can recreate them in WordPress using form plugins or embed blocks.
4. Organize Your Exported Data: Keep your CSV files and any supporting notes or assets in clearly labeled folders. This will simplify the import process and reduce the chance of missing content during the rebuild.
Step 4: Import Content Into WordPress
After exporting your CMS collections from Webflow as CSV files, the next step is to import that data into your WordPress site. Since WordPress doesn’t support CSV imports natively, you’ll need to use a plugin to handle the content transfer efficiently. Here’s how to do it:
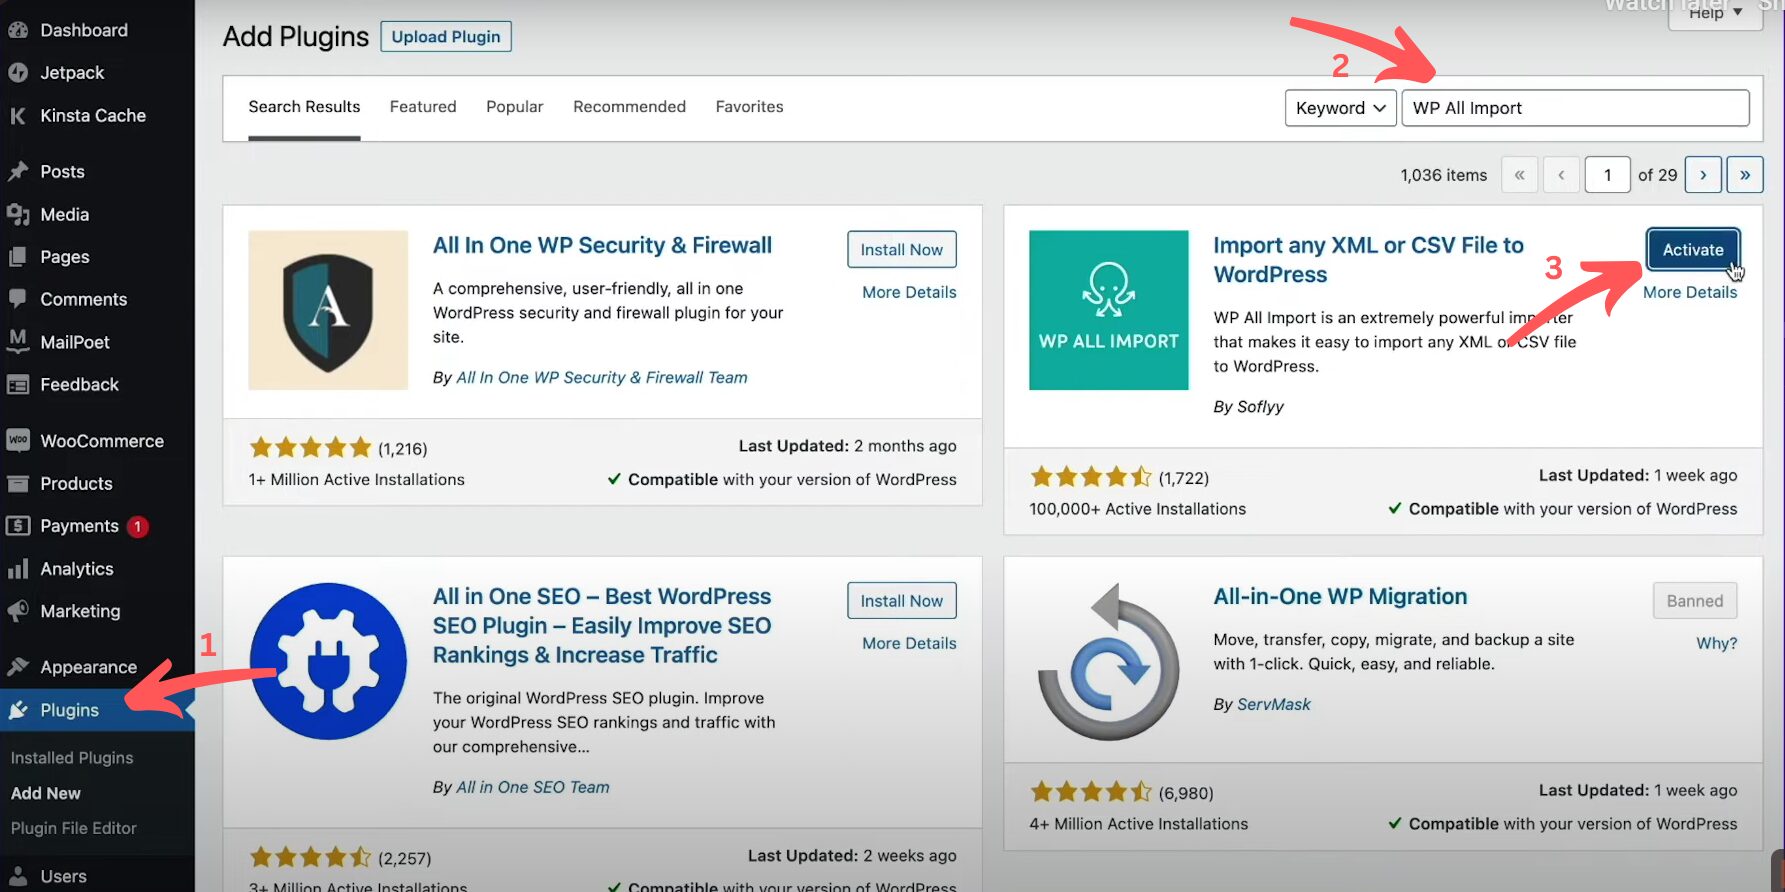
1. Install the WP All Import Plugin: From your WordPress dashboard, go to Plugins > Add New, search for WP All Import, and install the plugin. Once installed, activate it. The free version is sufficient for importing basic post content.
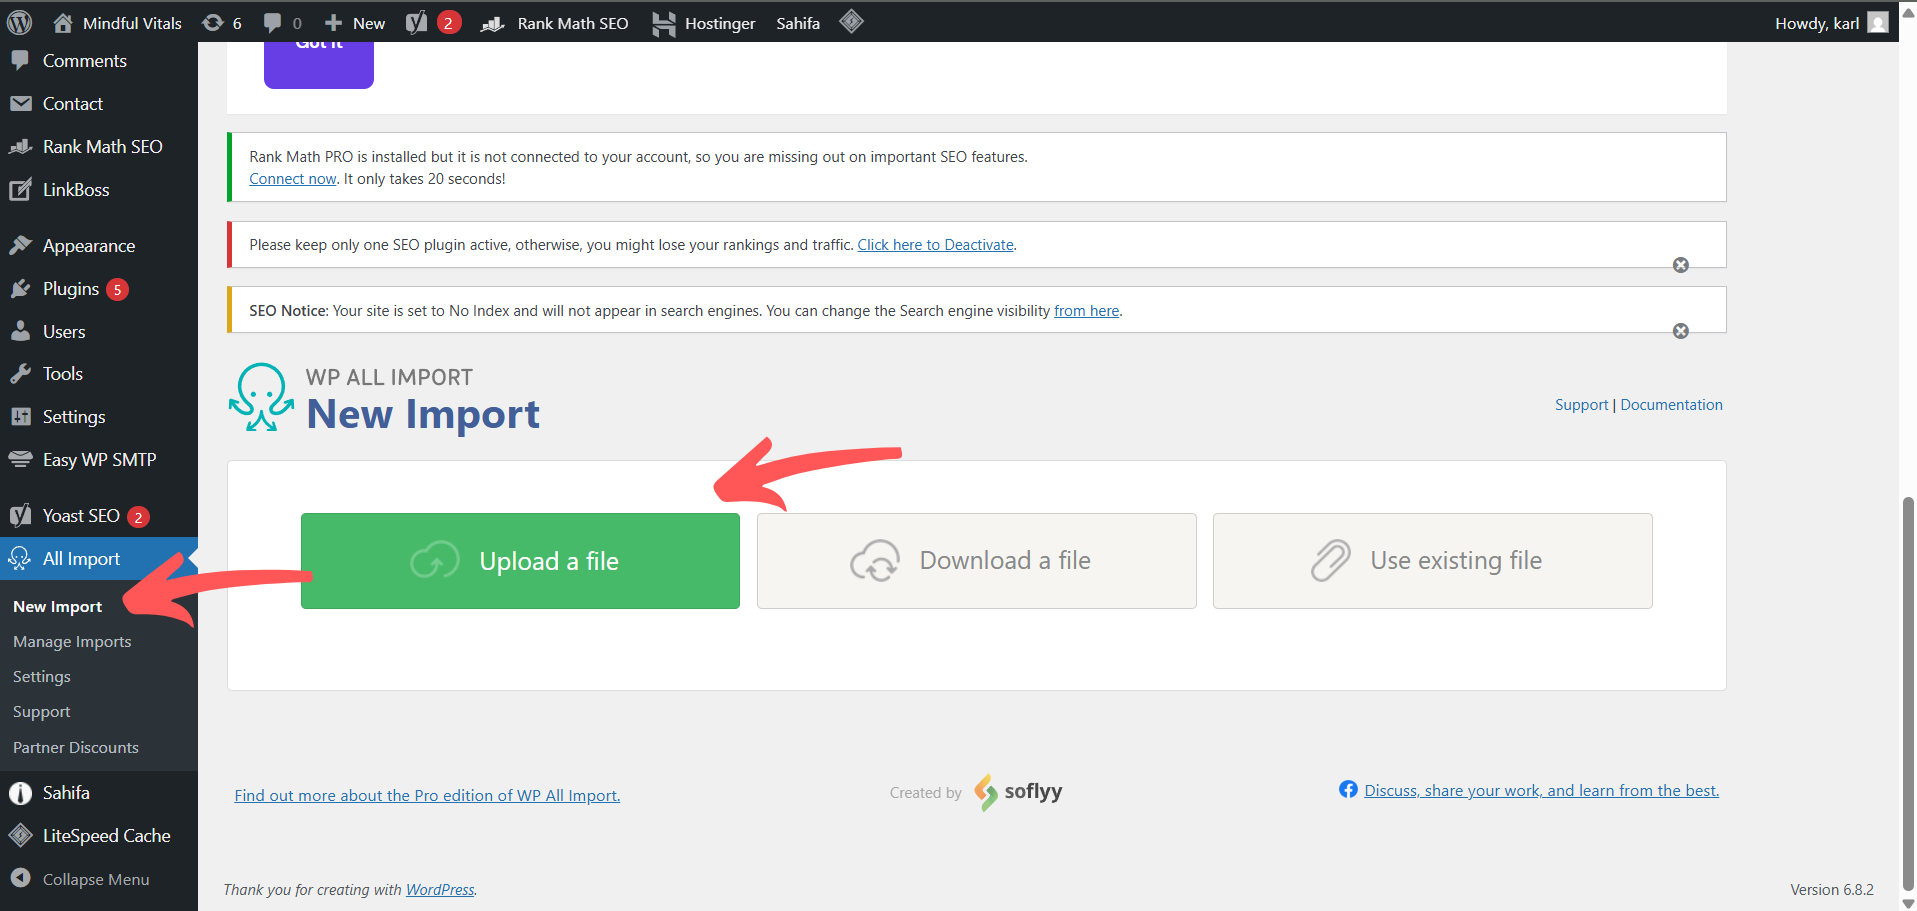
2. Start a New Import: After activation, navigate to All Import > New Import. Upload your CSV file that you exported from Webflow. The plugin will read the file and show you a preview of the data fields.
3. Select Post Type for Import: Choose whether you’re importing the data as Posts, Pages, or a Custom Post Type, depending on how your content should appear in WordPress. For example, blog articles should be imported as Posts.
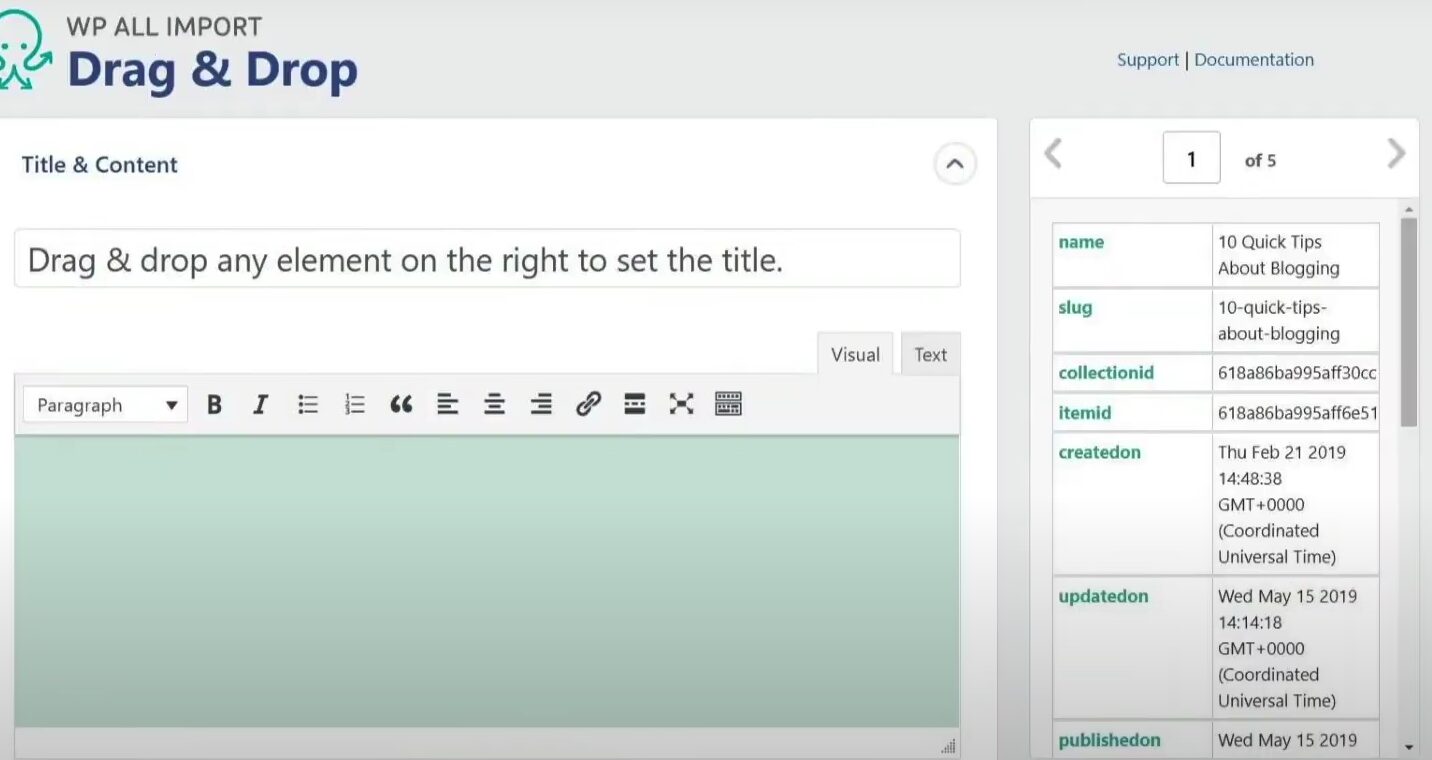
4. Map CSV Fields to WordPress Fields: WP All Import will let you drag and drop CSV fields into corresponding WordPress fields, such as post title, content, publish date, categories, and featured image URL. Take your time here to ensure accurate mapping.
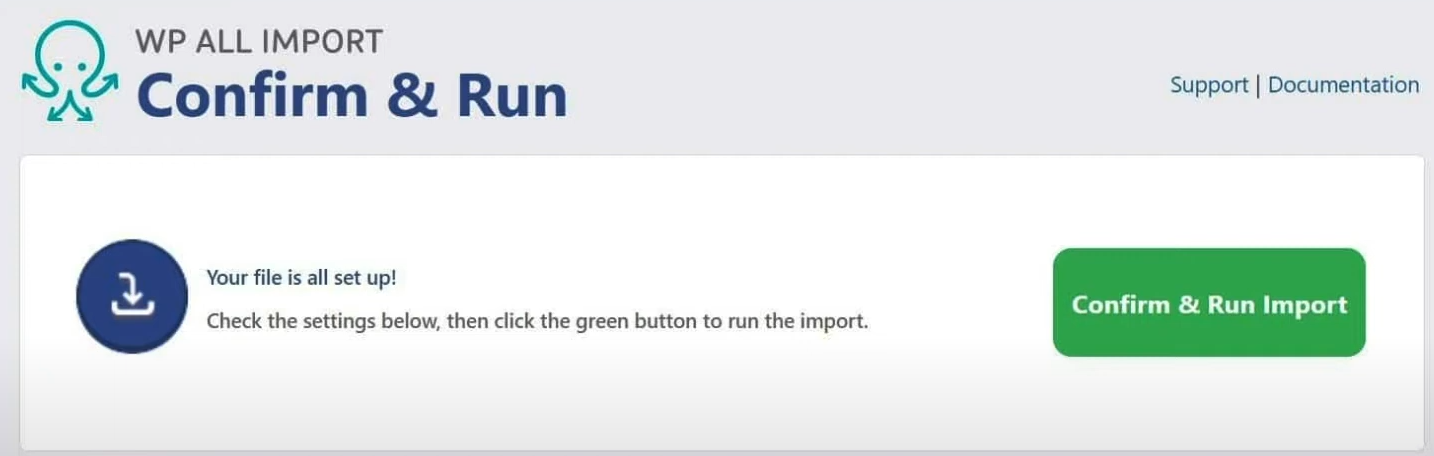
5. Run the Import Process: Once everything is mapped, run the import. The plugin will create WordPress posts or pages based on your CSV data. You’ll be able to review and edit the imported content after it’s processed.
Step 5: Choose and Install a WordPress Theme
Pick a theme that either closely matches your original Webflow design or gives you a clean slate to customize. WordPress offers thousands of free and premium themes, look for one that’s lightweight, responsive, and compatible with the features you need. Once installed, use the WordPress Customizer or a page builder like Elementor to replicate your Webflow layout. Apply global fonts, colors, and header/footer settings to match the original look.
Step 6: Configure WordPress Permalinks
To avoid broken links and preserve your existing SEO structure, it’s important to configure your WordPress permalink settings to match your Webflow URLs. Here’s how to do it:
1. Access Permalink Settings: In your WordPress dashboard, go to Settings > Permalinks.
2. Choose a Structure: Select a permalink format that closely matches your Webflow site. For blog content, “Post name” (/blog-post-title/) is a common and SEO-friendly choice.
3. Save Changes: After selecting your preferred structure, click Save Changes at the bottom of the page.
4. Manually Adjust Slugs (If Needed): If your Webflow URLs had a custom format or specific slugs, edit individual pages or posts in WordPress and manually set the permalink to match.
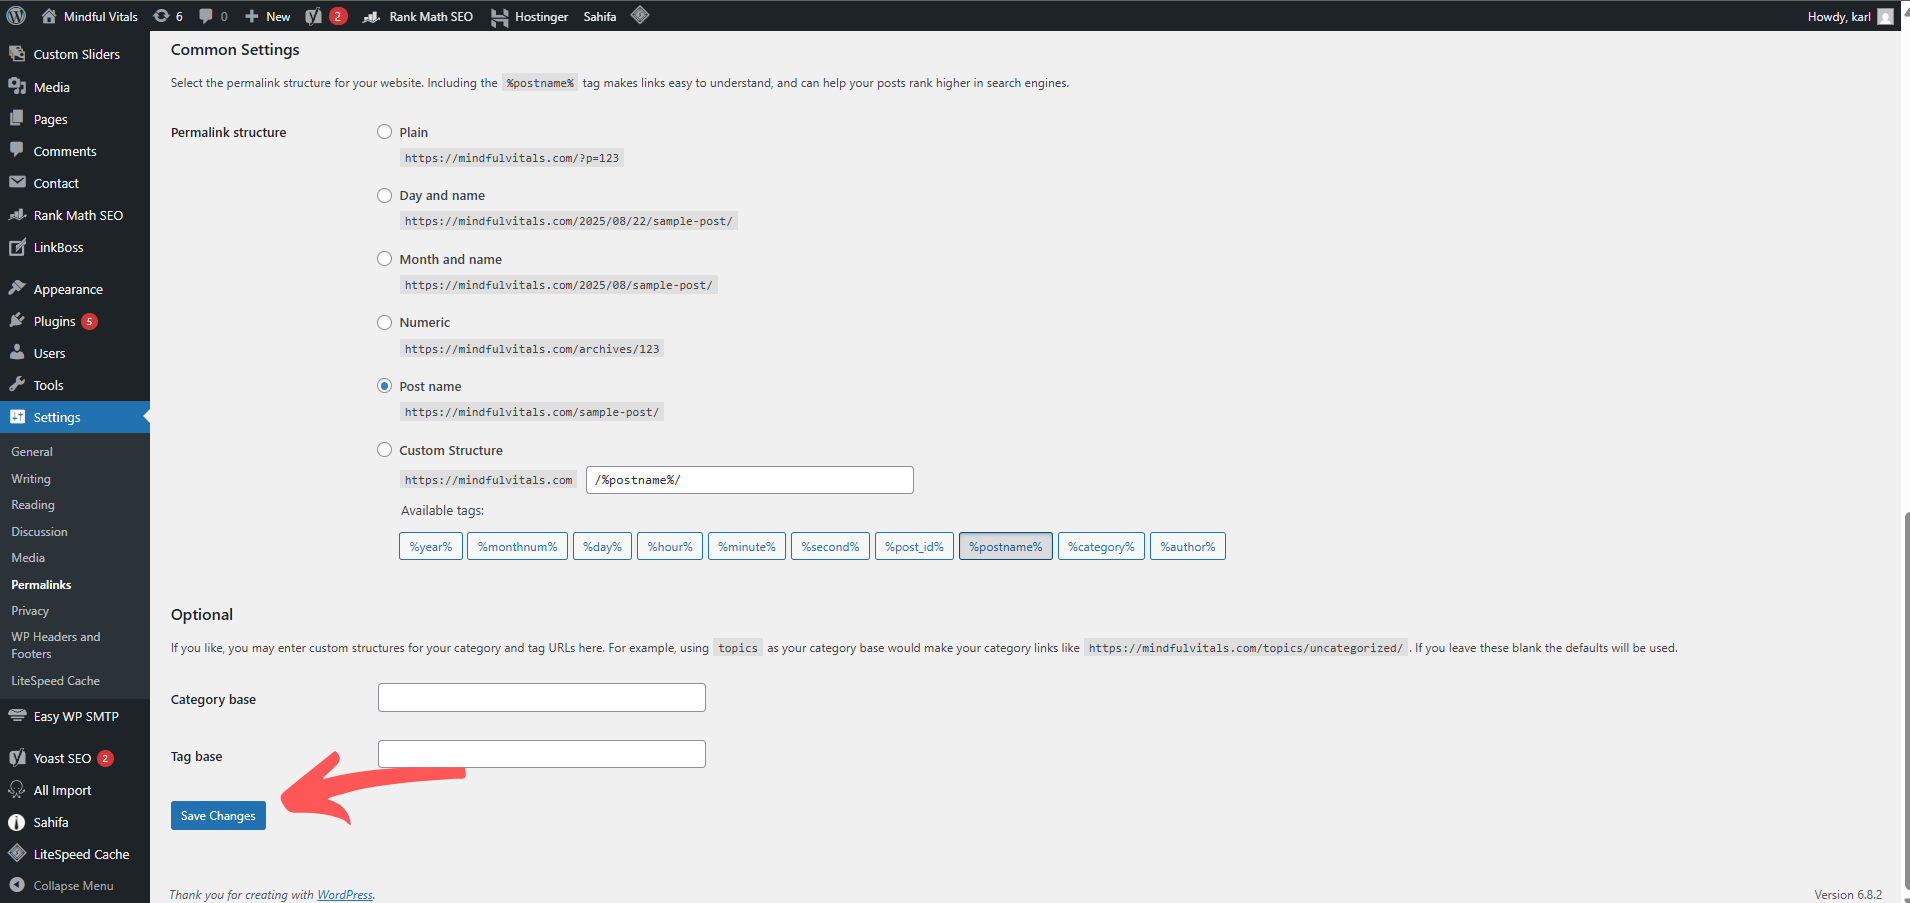
By aligning your URL structure, you preserve both SEO performance and user experience, ensuring that existing links continue to work after the migration.
Step 7: Point Your Domain to WordPress
Once everything is tested and your WordPress site is ready to go live, you’ll need to update your domain settings so it points to your new WordPress hosting. Follow these steps:
1. Log In to Your Domain Registrar: Access the account where you registered your domain (e.g., GoDaddy, Namecheap, Google Domains).
2. Locate DNS Settings: Find the DNS settings or Nameservers section for your domain.
3. Replace Webflow Nameservers: Remove the Webflow-provided nameservers and replace them with the nameservers provided by your new WordPress hosting provider. These are usually found in your hosting dashboard or welcome email.
4. Save and Apply Changes: Save your new DNS settings. Keep in mind that DNS changes may take up to 24–48 hours to propagate fully, though it often happens much faster.
5. Verify Site Launch: After propagation, visit your domain in a browser to confirm it now loads your WordPress site. Check pages, links, and functionality to ensure everything is working properly.
Conclusion
Migrating from Webflow to WordPress doesn’t have to be overwhelming. With careful preparation, clean exports, and a clear rebuild strategy, you can transfer your content and design without losing data or disrupting your audience. The move gives you complete ownership over your site, freedom to scale, and access to powerful tools only WordPress can offer. Whether you’re planning to grow your blog, expand your business, or simply want more control, WordPress offers a long-term foundation for your online presence.
