How to Optimize Your Website for AI Crawlers

As traditional search engines evolve into AI-powered platforms, websites must adapt to a new kind of visibility. Search traffic is no longer dictated solely by how well you rank in standard search engine results. Instead, inclusion in AI-generated overviews (AIO), summaries, and chatbot responses is becoming just as critical. To succeed in this new landscape, you must focus on making your site accessible, understandable, and optimized for AI crawlers. This article breaks down the technical and structural requirements to help AI systems effectively crawl, process, and cite your website. Key Takeaway: To appear in AI-powered search results and overviews, your website must have a crawlable structure, use structured data (schema markup), and be accessible via tools like Google Search Console. Avoid JavaScript-heavy pages, ensure fast load times, and remove barriers like login walls that block AI crawlers. Understanding How AI Crawlers Work AI crawlers function differently from traditional search engine bots. While conventional search engines index pages based on keywords and backlinks, AI-powered search engines, particularly those utilizing generative AI, prioritize context, relationships, and factual accuracy. AI agents, such as those used in tools like Google’s AI Overviews, analyze structured and unstructured data to generate summarized responses to search queries. Unlike traditional search engines, many AI systems aim to provide direct answers, often citing websites as sources in their overviews. These AI models use advanced algorithms to scan and interpret content beyond surface-level SEO. If your website isn’t technically accessible, it won’t be processed or cited in AI search results, no matter how good the content is. Ensuring Your Site is Crawlable by AI Systems To appear in AI-powered search trends and results, your website must be structurally sound and technically accessible. Start by verifying that your site has a valid and updated XML sitemap. This helps both search engine crawlers and AI bots locate and index your pages. Ensure your robots.txt file isn’t accidentally blocking critical paths that AI crawlers may need access to. HTML should be clean and free from unnecessary JavaScript obstructions. Generative AI search engines often struggle with sites built heavily on client-side rendering or SPA frameworks. These can render parts of your website invisible to AI-powered search engines. Canonical tags should be used correctly to prevent confusion caused by duplicate content, and your internal linking structure should facilitate easy navigation for crawlers. Using Structured Data to Help AI Understand Your Content AI search engines rely heavily on context and relationships between entities, not just keywords. Structured data using schema markup communicates the meaning and function of your content. This allows AI crawlers to extract and understand your site’s elements more effectively. Marking up articles, product pages, and reviews with structured data makes it easier for AI tools to use your information in AI overviews, voice search responses, and other AI-driven formats. It also improves your chances of being cited by AI systems that depend on metadata to verify credibility. Optimizing your website for AI search means speaking its language—and that language is structured data. Server and Accessibility Optimization for AI Systems Search crawlers and Many AI systems often abandon a site if it loads too slowly or inconsistently. Server performance directly impacts crawl rates and the extraction of content. Make sure your hosting environment supports fast load times, secure connections (HTTPS), and high uptime. A mobile-friendly website is also critical. AI platforms, including those used by Google search, prioritize responsive sites because they reflect better usability for both humans and AI. Slow-loading scripts, inaccessible media, or broken links reduce crawl efficiency and limit your inclusion in AI search visibility. Avoiding Barriers That Block AI Crawlers Many websites unintentionally block AI crawlers by relying on login walls, session-based content, or excessive JavaScript rendering. AI search engines, like traditional bots, cannot interact with gated or dynamic content that lacks server-side rendering. This makes your site effectively invisible to AI. Disable unnecessary content restrictions, minimize excessive pop-ups, and provide static HTML alternatives whenever possible. Ensure your robots meta tags are not preventing indexing of key sections. These small changes help AI engines access your pages and improve your inclusion in search engine rankings and AI responses. Optimizing for Voice Search and Conversational AI Queries AI-powered search is evolving toward conversational interfaces, including voice search, chatbots, and contextual queries. While this section doesn’t focus on writing content, the way your site structures information matters. Use natural, question-based headings and concise answers to help AI tools and chatbots extract usable content for search responses. This kind of formatting helps you appear in AI summaries, voice search results, and even AI chatbots’ recommendations. Optimizing your website and content structure for conversational clarity provides AI systems with a better chance of understanding and utilizing your site. Monitoring Inclusion in AI Search and Overviews After making your site technically accessible, the next step is to monitor whether it’s being included in AI summaries or AI overviews. Tools that track AI search results are becoming quite common, especially as more websites aim to appear in AI-generated content. Platforms like Ahrefs and Semrush also offer this functionality to help monitor AI visibility, although they’re still evolving and can be pricey for some users. For traffic monitoring, Google Analytics can help identify visits coming from AI platforms like ChatGPT, Perplexity, and other models such as Claude or Bing’s Copilot. While GA4 doesn’t show ranking positions, it provides useful insights into referral traffic patterns from LLMs. Reviewing these trends helps refine your AI SEO strategies and identify which content is gaining traction with AI systems. Unlike traditional search results, generative engine optimization relies on consistent structure, clarity, and technical trust signals. The more your site aligns with these requirements, the better its chances of appearing in AI-driven search results and overviews. Conclusion The shift toward AI-powered search engines marks a significant turning point in how websites are discovered and evaluated. Traditional SEO remains essential, but it is no longer enough on its own. To fully optimize your website for AI, you must ensure that AI crawlers
What Programming Language Is WordPress Primarily Built With?

WordPress is one of the most widely used open-source content management systems in the world. It powers millions of websites, from simple blogs to complex e-commerce platforms. For anyone looking to develop, maintain, or customize a WordPress site, it’s essential to understand the programming languages that make up its core. Knowing what programming language WordPress is primarily built with provides valuable insight into how it works, how to extend its functionality, and how WordPress developers can harness its full potential. Key Takeaway: WordPress is primarily built with PHP, a server-side scripting language that generates dynamic web content and manages backend functionality. It also relies on HTML, CSS, and JavaScript to structure, style, and add interactivity to web pages, with MySQL handling the database operations that store all site data. Core Language: WordPress Is Primarily Built With PHP At the heart of WordPress lies PHP. This general-purpose scripting language is the main programming language behind WordPress, handling everything from processing form data to interacting with the database. When people ask what programming language WordPress is primarily built with, the clear answer is PHP. PHP is open-source and was designed to create dynamic web pages. In the case of WordPress, PHP code runs on the server, generating HTML that’s sent to the user’s browser. This approach allows WordPress to deliver customized content, respond to user actions, and build websites that adjust to various needs. PHP handles critical backend operations within WordPress. It processes login requests, manages user accounts, and ensures that content is pulled correctly from the database. The WordPress core, themes, and plugins are all primarily written in PHP, making it an important language for anyone who wants to develop with WordPress or understand how the system operates beneath the surface. Supporting Languages: HTML, CSS, and JavaScript While PHP is the core programming language, it doesn’t work alone. Several other languages are crucial for building a fully functional WordPress website. HTML, or Hypertext Markup Language, structures the content on a web page. It defines headings, paragraphs, images, and links, forming the foundation of every WordPress page. Cascading Style Sheets, known as CSS, control the presentation of that HTML content. CSS enables developers to style fonts, colors, and layouts, creating designs that adapt to different screen sizes and devices. JavaScript adds interactivity and dynamic behavior to WordPress sites. It allows elements to change without reloading the entire page, making user interfaces smoother. Many WordPress plugins and themes use JavaScript, and frameworks like React are sometimes employed to build more advanced features. This combination of HTML, CSS, and JavaScript ensures that WordPress websites look appealing and respond to user interactions effectively. Database: WordPress Uses MySQL for Data Management In addition to its primary programming language, WordPress relies on a powerful database system to store and retrieve information. WordPress uses MySQL, a widely adopted open-source database management system that organizes data in tables and allows for efficient querying through Structured Query Language (SQL). When a user visits a WordPress site, PHP scripts generate requests to the MySQL database. This process retrieves posts, pages, user information, and plugin settings. MySQL works seamlessly with PHP, enabling the content management system to build pages based on stored data dynamically. Whether updating a blog post, managing comments, configuring, or changing theme, the database plays a vital role in every aspect of WordPress. Understanding how PHP interacts with MySQL helps developers troubleshoot issues and optimize performance. It also forms the basis for creating custom queries or developing more advanced features that rely on the database. Themes, Plugins, and Extending WordPress Functionality One of the reasons many developers choose WordPress is its flexibility. Themes and plugins allow users to customize the look and expand the capabilities of their WordPress sites without altering the core. But behind these convenient tools are the same essential programming languages. Themes dictate how content appears, combining PHP to pull data from the database, HTML to structure it, CSS to style it, and JavaScript to add interactivity. Plugins function similarly but focus on extending what WordPress can do, such as adding forms, integrating e-commerce, or improving SEO. Most plugins are also primarily built with PHP, often using JavaScript for client-side interactions and HTML elements for output. Developers can customize WordPress themes and plugins by writing PHP code or tweaking CSS styles. This is where knowledge of the main programming languages used by WordPress becomes especially valuable. By understanding how PHP enables backend processes, how HTML structures content, how CSS styles it, and how JavaScript adds functionality, developers can tailor a WordPress site to specific goals. Why Knowing the Language Behind WordPress Matters For beginners building their first WordPress website, understanding that WordPress is primarily built with PHP provides context for why certain things work the way they do. For experienced developers, it’s critical knowledge that allows for deeper customization, troubleshooting, and optimization. Knowing that PHP generates dynamic content, manages user authentication, and responds to form submissions explains many backend behaviors. Realizing that HTML and CSS control the front end clarifies how to adjust layouts or ensure that designs adapt to different screen sizes. Recognizing the role of JavaScript highlights how interactive elements like sliders or modal windows are built. Understanding the MySQL database connection underscores how WordPress organizes and serves content. WordPress development revolves around these technologies. Whether you want to make WordPress faster, extend its functionality with custom plugins, or develop entirely new themes, it all comes back to this collection of programming languages working together. Conclusion Understanding the language foundation of WordPress isn’t just a technical detail—it’s a gateway to unlocking its full potential. Whether you’re aiming to create unique themes, develop powerful plugins, or simply gain more control over your site, knowing how WordPress operates beneath the surface empowers you to build with confidence and creativity.
How to Delete Your WordPress Site From Your Account on Web-Server

Managing your sites effectively is key to keeping your Web-Server account organized and running smoothly. This guide will walk you through the exact steps to delete a WordPress website from your Web-Server account. Whether you’re clearing out old projects, optimizing server resources, or simply tidying up, this straightforward process will help you safely remove any WordPress site you no longer need, while avoiding common mistakes along the way. Why Would You Want to Remove a WordPress Site? There are several reasons why you might decide to delete a WordPress site from your account: What to Consider Before Deleting Your Site Before you proceed, it’s crucial to understand that deleting your WordPress site is a permanent action. Once removed, all your website files, content, and databases tied to that site will be gone and cannot be recovered. Also consider: Need to keep your content? We strongly recommend creating a full backup before you delete your site. You can follow our dedicated guide here: How to Back Up Your WordPress Site. How to Safely Delete Your WordPress Site From Your Account Follow these simple steps to safely delete your WordPress site from your hosting dashboard. Step 1: Log In to Your Web-Server Account Start by logging into your Web-Server account using your username and password. Once logged in, you’ll arrive at your main dashboard, where all your hosted sites are displayed. Step 2: Select the WordPress Site to Remove Navigate to your Instances dashboard. Locate the WordPress site you want to remove. You can either: Step 3: Initiate the Deletion Process A pop-up window will appear asking what data you’d like to remove: Choose one or both options depending on how thoroughly you want to clean up.Finally, check the confirmation box to acknowledge that this action is irreversible, then click “Delete Instance.” Note: Once deleted, your site and its data cannot be recovered. Step 4: Confirmation The system will process your request, and you’ll see a confirmation message once your site has been successfully removed. Troubleshooting Common Issues If you run into problems during the deletion process, here’s how to handle them: Conclusion Deleting a WordPress site is an effective way to keep your hosting environment organized, secure, and tailored to your current projects. Just be sure to back up any important data beforehand to avoid accidental loss. If you run into any issues, double-check the steps above or consult additional resources to ensure everything is handled smoothly. Taking a careful approach will help you maintain a clean, efficient, and worry-free hosting setup.
How to Put WordPress in Maintenance Mode

Putting your WordPress site in maintenance mode is an essential practice whenever you’re making significant updates or changes. It ensures visitors don’t encounter a broken or unfinished website, and it conveys professionalism with a clear message that your site is temporarily unavailable for scheduled maintenance. Whether you’re performing updates, redesigning your pages, or troubleshooting technical issues, knowing how to enable maintenance mode protects both your reputation and your user experience. Key Takeaway: Put your WordPress site in maintenance mode to safely perform updates or changes without exposing visitors to errors. Use a plugin like WP Maintenance Mode for quick setup, or create a .maintenance file for manual control. Always remove maintenance mode when finished to bring your site back online. Why Put Your WordPress Site in Maintenance Mode Enabling WordPress maintenance mode on a website provides a controlled way to handle downtime. When you make changes to your WordPress site, such as installing new themes, updating plugins, or customizing core files, there’s always a risk of errors appearing to your visitors. A maintenance mode page prevents this by displaying a clear notice that your site is under maintenance, assuring users that the site will return soon. This approach is also vital during larger maintenance tasks like migrating your website or performing security fixes. Without maintenance mode, visitors might see incomplete layouts, malfunctioning features, or confusing error messages. Using maintenance mode gives you the privacy to work on your site without exposing transitional problems, and it reinforces trust by communicating that the downtime is intentional and temporary. Choosing the Right Approach for Your Site Before diving into how to put your WordPress website into maintenance mode, it’s important to consider which approach best fits your site’s needs and your level of technical confidence. A small personal blog might only require a simple maintenance page, while a high-traffic business site could benefit from a custom maintenance mode page with branding and notifications. Understanding your priorities, whether that’s quick setup, deep customization, or minimal reliance on plugins, will help you decide how to implement maintenance mode. This way, you’ll ensure your website in maintenance mode still aligns with your goals, keeps your visitors informed, and protects your reputation during updates. Using a Maintenance Mode Plugin Installing a maintenance mode plugin is the simplest way to put your WordPress site into maintenance mode. Plugins like WP Maintenance Mode or Maintenance allow you to activate maintenance mode with a few clicks from your WordPress dashboard. These tools offer features beyond just blocking access; they let you customize the maintenance message, design a branded maintenance page, and even add subscription forms so visitors can be notified when your site is back. With the maintenance plugin, you gain precise control over the maintenance mode option, such as deciding who can still access the website. For example, you can allow logged-in administrators to see the live site while all other visitors see a maintenance message. This flexibility ensures you can continue to test changes on the frontend without disabling maintenance mode. Using a maintenance mode plugin also avoids common pitfalls like getting stuck in maintenance mode due to leftover files. Most plugins manage the process cleanly, preventing issues that can arise from manual edits. How to Enable Maintenance Mode Manually If you want to enable maintenance mode without a plugin, you can do so by adding a small snippet of code to your theme’s functions.php file or by creating a maintenance file in your WordPress root directory. This method is ideal for developers or site owners who are comfortable editing files directly, as it avoids adding extra plugins to your site. A common manual approach involves placing a .maintenance file in your site’s root directory. When WordPress detects this file, it automatically serves a standard maintenance page to visitors. Alternatively, adding a custom function in functions.php can let you display a personalized maintenance mode message. Manual methods provide greater control but come with risks if handled incorrectly. Mistyped code or forgotten maintenance files can leave your website stuck in maintenance mode. Always back up your site before making manual changes and test thoroughly to ensure your site is only in maintenance mode when intended. Fixing a Site Stuck in Maintenance Mode Sometimes, after updates fail or processes are interrupted, your site may get stuck showing “Briefly unavailable for scheduled maintenance.” This usually happens when the .maintenance file remains in your WordPress root directory even after the update completes. To fix this, access your site via FTP or your hosting file manager, locate the .maintenance file, and delete it. Your site should immediately return to normal. If you use a plugin and the site remains stuck in maintenance mode, disable the plugin from your plugins directory or via your WordPress dashboard. Understanding how to disable maintenance mode is crucial to avoid extended downtime and reassure visitors that your website is live again. Customizing the Maintenance Mode Page A generic maintenance mode page does little to engage visitors. Customizing the maintenance message and page design helps maintain your brand’s voice even when your website is under maintenance. Many maintenance mode plugins allow you to upload your logo, adjust colors, and write a friendly message explaining the maintenance period. A well-crafted maintenance mode landing page can also include options for visitors to sign up for updates or follow you on social media, keeping your audience engaged while your site is temporarily inaccessible. This approach turns downtime into an opportunity to strengthen customer relationships. Testing and Managing Your Maintenance Mode After activating maintenance mode, clear the cache and open your website in an incognito window to see exactly what visitors experience. This ensures your maintenance page displays correctly and confirms that logged-in administrators can still access the full site to continue making changes. Monitoring the process from your WordPress dashboard allows you to turn off maintenance mode as soon as your updates are complete. Regular checks help you avoid leaving the site in maintenance mode longer than necessary, preserving your SEO
How to Migrate From Squarespace to WordPress

Squarespace is a popular platform for building websites because it combines hosting, templates, and security in one place, making it simple for beginners to get started. However, as your needs evolve, you might find its limitations, particularly in terms of flexibility, advanced functionality, and full ownership, restrictive. That’s why many site owners look to WordPress as an alternative that offers more control, scalability, and customization. In this article, we’ll explore what sets Squarespace apart from WordPress and why many users choose to switch. We’ll then walk you through the process of preparing your Squarespace site for migration, selecting the right web host, exporting your content, and importing it into a new WordPress site. You’ll also learn how to handle SEO considerations, set up redirects, transfer your domain, and customize your new WordPress website for long-term growth. Key Takeaway: The migration from Squarespace to WordPress involves exporting your content via Squarespace’s export tool, importing it into WordPress using the WordPress importer, and manually transferring unsupported content like product pages. You must choose a reliable web host, set up redirects to preserve URLs, and update DNS settings to point your domain to the new WordPress site. Customizing your WordPress site with themes and plugins completes the process for full control and flexibility. What is Squarespace and Why Migrate to WordPress? Squarespace is a widely used website builder that offers attractive templates, built-in hosting, and easy site management in a single package. It’s especially popular with small businesses, creative portfolios, and anyone looking to launch a website quickly without managing technical components. However, as your site grows and your needs become more complex, Squarespace often reveals its limitations in flexibility and advanced functionality. Many site owners eventually choose to move from Squarespace to WordPress to gain complete control over their website. With WordPress, you can install any plugin, customize the underlying code, and manage your database and files, allowing for far more tailored solutions. Whether you want to build a membership platform, integrate sophisticated marketing tools, or handle higher traffic volumes, WordPress makes it possible. This is why so many ultimately decide to switch from Squarespace to WordPress, for greater freedom, ownership, and long-term scalability that isn’t possible on Squarespace. Preparing to Move from Squarespace to WordPress Before you start exporting Squarespace content, take the time to review your old Squarespace website thoroughly. Log into your Squarespace account and list all key areas: pages, blog posts, galleries, custom CSS, and any special features. Check how your Squarespace URLs are structured so you can match or improve them on WordPress. Make a note of your most valuable content and ensure you have backups in place. Having a clear migration checklist saves countless hours in the long run, avoiding missed pages or broken links when moving your Squarespace site to WordPress. Choosing a Web Host and Installing WordPress Unlike Squarespace, WordPress requires you to choose a web host. This means selecting where your website’s files and database will live. Look for a host that specializes in WordPress hosting, offering tools such as one-click WordPress installation, automatic updates, and robust support. If you’re running a simple site, a shared hosting plan is often enough. For growing traffic or e-commerce, managed solutions or VPS provide better resources. After setting up your hosting, most providers let you install WordPress with a single click. This gives you access to the WordPress dashboard, where you’ll manage everything from pages to plugins. Exporting Your Squarespace Content Squarespace allows for content export, but it’s limited. Log in to your site settings and use their export tool to generate a Squarespace XML file. This file typically includes your blog page, posts, standard pages, and some basic galleries. However, Squarespace doesn’t export products, event calendars, or some custom blocks; you’ll have to recreate those manually in WordPress. Save your export file securely. This will serve as your bridge to transfer content from your Squarespace website to WordPress. Importing Content Into Your New WordPress Site Next, navigate to your WordPress dashboard, then go to Tools > Import and install the WordPress importer. Select your Squarespace export file and run the importer. This process transfers your core Squarespace content, including pages and posts, into your new WordPress pages and posts. After importing, review all the content inside your WordPress dashboard. Ensure that all titles, text, and layouts are transferred accurately. If you find missing sections, you may need to copy them manually or rebuild using WordPress blocks. Importing Images into the WordPress Media Library A common issue in the Squarespace to WordPress migration is that images often don’t automatically move. Squarespace export files typically link to images rather than embedding them. To fully migrate Squarespace images from your Squarespace site, use a plugin like Auto Upload Images or manually upload images into the WordPress media library. This ensures your visuals load from your server, preserving brand consistency and improving speed. Adjusting Permalinks, Internal Links, and Menus Maintaining your SEO rankings during the migration process depends on replicating or improving your Squarespace URLs. Go to Settings > Permalinks in WordPress and choose a structure close to your old site. This makes it easier to redirect traffic properly. Rebuild your site menus inside the WordPress dashboard to match your old navigation. Then, scan through pages and posts to update any Squarespace links so they point internally to your new WordPress website. This prevents broken journeys for users and helps search engines index your new site cleanly. How to Follow the Best SEO Practices During Migration Maintaining your search rankings is crucial when migrating from Squarespace to WordPress. If you change any URLs, make sure to set up 301 redirects from your old Squarespace URLs to your new WordPress pages using a plugin like Redirection. This tells search engines that your content has permanently moved, helping to preserve your existing rankings. Another option is just to keep the same URL addresses as before. Next, install an SEO plugin such as Yoast SEO or Rank Math to manage your
Laravel vs WordPress: Which is Better For You?
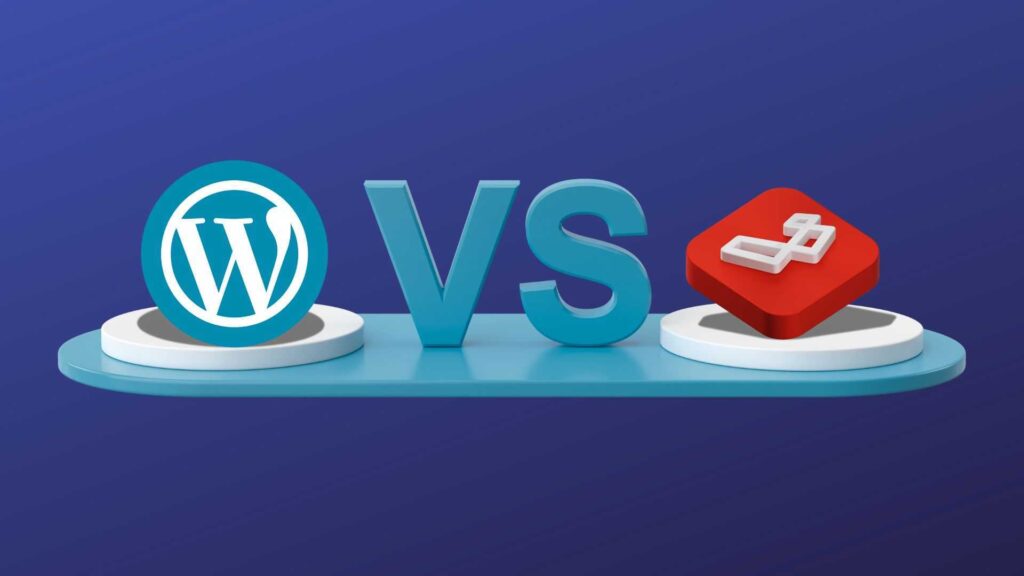
Choosing between Laravel and WordPress is a crucial decision when planning to create a website. Both are open-source platforms widely used by developers and businesses, but each serves different needs. Knowing how WordPress and Laravel compare ensures you pick the best choice for building a secure, scalable, and SEO-friendly online presence. Whether your goal is a standard business website or a tailored ecommerce website, understanding these tools helps you make informed decisions. Key Takeaway: Use WordPress if you need a fast, content-focused website with built-in SEO and easy management. Choose Laravel if you require a custom, secure, and scalable application tailored to complex business needs. Each serves different goals – select the one that best suits your project’s specific functionality and growth plans. Understanding WordPress WordPress is a content management system (CMS) that powers more websites than any other platform. This popular CMS is an open-source version of WordPress initially built for blogging, and has now evolved into a robust tool for all kinds of websites. From simple blogs to full-featured WordPress websites, it’s widely chosen because WordPress makes it easy to launch an online presence. WordPress also offers thousands of themes and WordPress plugins that expand functionality without writing code. You can build everything from a blog to a WordPress site with complex booking systems or a WordPress database supporting online sales. Its admin panel streamlines content updates, letting anyone publish articles, manage images, and optimize posts for SEO. Managed WordPress hosting is another reason it’s a top pick; it handles updates, security monitoring, and backups. Many businesses choose WordPress because it’s free to use and supported by a massive community of WordPress development experts. Whether it’s a WordPress core install for a simple blog or a full WordPress customization, the platform remains versatile. What is Laravel? Laravel is a PHP framework, specifically an open-source PHP framework, designed for developers who need complete control. Unlike WordPress, which is a CMS, Laravel is a framework that gives developers the tools to craft custom web applications from scratch. This makes it ideal for projects that need more than what plugins or themes can provide. Laravel offers features such as Eloquent ORM for managing complex database relationships, the Artisan CLI for automating repetitive tasks, and Blade templating for creating clean frontend views. These features contribute to Laravel’s streamlined workflow, enabling teams to build robust systems tailored to their exact business needs. Because Laravel is a web application framework, it’s perfect for creating platforms beyond simple websites. For instance, you might use Laravel to power a logistics platform, a subscription service, or a secure internal dashboard, all things that a standard WordPress site might struggle to support. In this way, Laravel provides not just flexibility but the foundation for innovation, backed by a strong developer ecosystem. Comparing Flexibility and Customization In the Laravel vs WordPress debate, flexibility often tips the scale. WordPress customization revolves around selecting themes and stacking plugins. While this allows you to add impressive features to your WordPress website, it can be limited by what the theme or plugin developer intended. Laravel offers complete freedom to build any functionality you envision, without constraints from plugins. This is why many teams invest in Laravel developers to design systems exactly matching their operations. For example, a startup might use WordPress for a fast launch of an online store, leveraging WooCommerce. But as needs grow, they could shift to a Laravel website that handles complex inventory, automated invoices, or multi-vendor capabilities that typical WordPress plugins can’t manage efficiently. It’s worth noting that hybrid models exist. Many businesses opt to use Laravel with WordPress conjunction, running both Laravel and WordPress simultaneously. In this setup, WordPress handles content through its backend admin panel, while Laravel provides a tailored frontend. Here’s how Laravel and WordPress can complement each other: you get the familiar content tools of WordPress with the power and custom workflows that Laravel applications enable. Performance and Security Considerations When comparing WordPress vs Laravel for performance, Laravel pages load faster due to its lean, custom-coded architecture, which avoids the bloat that plugins can introduce. Laravel also gives developers precise control over caching, database queries, and load balancing. In terms of security, Laravel is considered more secure than WordPress by default, as it ships with built-in features such as CSRF protection, encrypted storage, and strict authentication. Laravel requires developers to build most elements, which means they can enforce high security standards from the start. WordPress can also be very secure, but risks often arise from third-party plugins. Regular updates to the WordPress core and the use of vetted plugins help mitigate these threats. Managed WordPress hosting often helps by automating updates and scanning for vulnerabilities, making WordPress still a secure option for many scenarios. SEO and Content Management For SEO and content control, WordPress is a better choice for most straightforward projects. It’s a content management system designed to handle posts, pages, categories, and tags right out of the box. Plugins like Yoast SEO make technical optimization accessible to non-technical teams. Laravel doesn’t include built-in SEO or content handling. If your business prioritizes complex content structures with immediate SEO tools, WordPress is likely the better option. Meanwhile, Laravel might be chosen by companies needing precise control over how URLs, metadata, or dynamic content is structured for search engines, though this takes more developer time. Maintenance, Cost, and Developer Involvement Both Laravel and WordPress are free to use, as they are open-source. However, with WordPress, most costs come from premium themes, plugins, and ongoing WordPress hosting fees. Maintenance involves regular updates, ensuring plugin compatibility, and maintaining backups. By contrast, Laravel requires hiring developers to build and maintain the application. This means higher upfront costs, but it results in a platform built exactly to your business needs, often reducing the long-term costs of workarounds or plugin conflicts. It’s why many growing businesses see Laravel as a better option for long-term scalability. Quick Comparison Table Feature WordPress Laravel Type Content Management System (CMS) Open-source PHP Framework Ease
What Is Reseller Hosting?
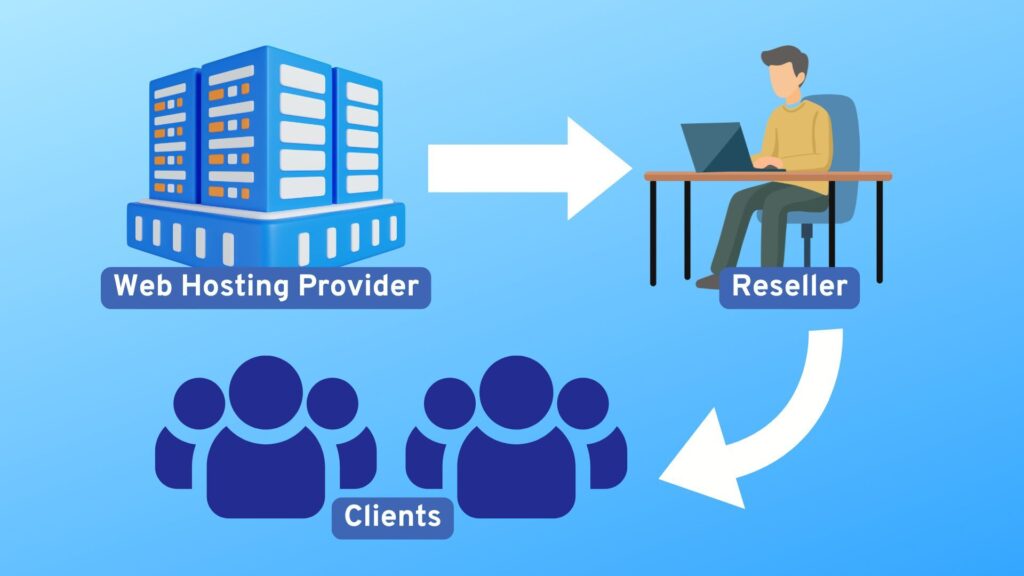
As more individuals and businesses move online, the demand for dependable website hosting continues to surge. This steady growth in the web hosting market creates valuable opportunities not just for established hosting companies but also for entrepreneurs, web developers, and agencies eager to build new revenue streams. One of the most practical ways to enter this industry is through reseller hosting, which enables you to offer web hosting services under your own brand without incurring the costs of expensive infrastructure. This article will explore what reseller hosting is, how it works, its key features and benefits, and what to consider when starting a reseller hosting business. It will also look ahead at trends shaping this field, helping you determine if this is the right path as your business grows. Key Takeaway Reseller hosting allows individuals or businesses to purchase server resources from a larger provider and resell them under their brand. It offers white-label control panels, automated billing, and scalable resources, enabling entrepreneurs to start a hosting business with low upfront costs and minimal technical management. Understanding Reseller Hosting Reseller hosting is a business arrangement where you purchase a set amount of server resources, such as disk space and bandwidth, from a larger web hosting provider, then resell those resources as customized hosting packages to your own clients. This model lets you operate like a standalone web hosting company, controlling your pricing, branding, and customer relationships. Unlike shared hosting, which is designed for a single website owner to rent space on a server, or managed hosting, where a provider handles nearly everything for you, reseller hosting is built for those who want to offer hosting as a service. It’s especially popular among web designers, marketing agencies, and freelancers who can bundle hosting with other services, such as web development or SEO. A common misconception is that reseller hosting is just a bigger shared hosting account with more websites. In reality, it’s a genuine white label business model that enables you to create distinct client accounts, manage them separately, and brand everything under your own company name, without your clients being aware that a third-party provider powers the backend. How Does Reseller Hosting Work? The process begins by selecting a reseller hosting provider, which is a company that specializes in reseller hosting programs. They provide the underlying hosting infrastructure, handle technical support, security, routine backups, and ensure the servers run smoothly. When you sign up for a reseller hosting plan, you receive access to a control panel such as cPanel or Plesk, along with administrative tools that allow you to: What makes this model especially appealing is that your hosting provider handles the most technical aspects. They maintain server uptime, monitor security threats, and offer tech support, while you focus on marketing your services and managing customer relationships. This separation of responsibilities allows you to operate a professional web hosting company without incurring significant expenses for data centers or hiring a technical team. As your client base grows, you can adjust your reseller plan to include more resources or advanced features, such as cloud hosting and VPS capabilities. This flexibility enables your hosting business to scale in tandem with your customers, delivering the performance and reliability they expect under your brand. Key Features, Benefits, and Revenue Opportunities Most reseller hosting packages come packed with features that make managing your own web hosting business straightforward. These include: One major advantage of starting a reseller hosting business is the minimal initial cost. There’s no need to buy or maintain servers. You essentially rent resources at wholesale prices, set your own retail rates, and pocket the margin. This allows you to scale your operation without the need to invest heavily upfront. You also open doors to multiple revenue streams. Many reseller businesses sell web extras, such as domain names and SSL certificates, or offer additional services like web development, marketing, or content creation. By packaging these together, you can increase your average customer value and provide a more comprehensive solution. While advanced server knowledge isn’t required, you should feel comfortable using control panels, understanding basic DNS concepts, and assisting clients in navigating their accounts. The more confident you are technically, the smoother your operations and customer interactions will be. How to Start Your Reseller Hosting Business Getting started begins with selecting the right reseller hosting company. Look for a provider with reliable uptime, responsive technical support, flexible resource allocations, and robust security measures. Determine whether you require Linux or Windows servers and consider options such as cloud hosting or VPS for future growth. Next, define your target audience. Are you aiming to serve small businesses in your region, freelance developers, or perhaps niche e-commerce brands? Knowing who you want to reach will shape how you design your hosting packages. When it comes to pricing, most resellers offer monthly plans, but some provide pay-as-you-go structures tied to actual usage. Your reseller plan costs will form your base, so factor in your desired margins, competitor pricing, and the amount of server resources you’re offering. As you gain experience, you can adjust pricing and add premium tiers with extra disk space, increased bandwidth, or complimentary SSL certificates. Finally, focus on marketing and customer acquisition. Leverage your existing web development or design clients, build a professional website showcasing your services, and use social proof to attract your first accounts. Over time, referrals and targeted promotions will help your client base grow. Future Trends in Reseller Hosting The web hosting industry is evolving rapidly. More small businesses want bundled solutions—web design, domains, and hosting managed by a single provider they trust. This is a significant advantage for hosting resellers, who can offer personalized service that larger corporations often cannot. Meanwhile, advances in cloud hosting and VPS technology enable you to offer scalable, high-performance solutions that adapt as your clients grow. Security remains a top priority, with integrated firewalls, malware scanning, and automated backups now standard in even the most basic reseller hosting plans. As automation improves, you’ll spend
How Hosting Affects SEO

When most businesses consider search engine optimization, their focus tends to be on keywords, content quality, and backlinks. However, one critical factor often gets overlooked: web hosting. The hosting provider and plan you choose can significantly shape how your website performs in search engines. From load time and server reliability to security measures and scalability, these behind-the-scenes elements can directly impact your site’s visibility and rankings. In this article, we’ll explore how different aspects of web hosting affect SEO. We’ll discuss the importance of server performance and uptime, the role of data center locations, the impact of various hosting types, and why security and scalability are crucial for achieving long-term search success. By understanding these connections, you’ll be better prepared to choose the right hosting solution to support your SEO efforts. Key Takeaway Web hosting directly affects SEO through factors like site speed, uptime, server location, security, and scalability. Reliable, fast, and secure hosting improves search rankings by enhancing user experience and ensuring consistent site availability. The Role of Server Performance and Page Speed in SEO Page speed is a major ranking factor for Google and other search engines. The quality of your hosting provider’s server has a significant impact on how quickly your pages load. A slow server increases load time, frustrating visitors and raising bounce rates. High bounce rates signal to search engines that your content may not be valuable or relevant, which can lead to lower search rankings. Reliable servers, optimized configurations, and a hosting plan that includes features such as caching or a content delivery network (CDN) can significantly improve site speed. This technical SEO foundation ensures that your website loads quickly across different devices and locations, thereby improving user engagement and increasing your chances of ranking higher in search engine results. Uptime, Reliability, and Their Impact on Search Engine Rankings If your site frequently goes offline due to unreliable hosting, it can negatively impact your SEO. Search engines like Google may struggle to crawl your pages, or worse, remove them from the index if they consistently can’t access your content. High uptime is essential because it ensures your website remains available to both users and search engine crawlers. Choosing a web host provider with a strong uptime guarantee protects your organic traffic and preserves your hard-earned rankings. Even brief periods of downtime can disrupt indexing, harm your search engine performance, and ultimately affect your website’s credibility. Server Location and How Data Centers Affect SEO Where your hosting provider’s data centers are located matters more than many website owners realize. When servers are closer to your target audience, your website delivers content faster, which improves load time and provides a better user experience. This geographical proximity can positively affect your site’s SEO, especially for local searches. For global businesses, using a host that offers multiple data center options or integrates with a CDN ensures fast delivery worldwide. This strategy supports your site performance and search engine optimization by maintaining consistent speed regardless of where visitors access your site. Types of Hosting and Their SEO Implications Not all hosting solutions offer the same SEO benefits. Shared hosting is cost-effective, but it often places your site on a server with hundreds of other sites, which can slow your site during peak traffic times and negatively impact your search engine rankings. Cloud hosting and VPS hosting provide more dedicated resources, improving site speed and reliability. Managed hosting, including managed WordPress hosting, ensures servers are tuned for performance and security, which directly supports technical SEO. Dedicated hosting provides the highest level of control and speed, making it ideal for high-traffic sites that require guaranteed resources. Choosing the best host for SEO means selecting a hosting plan that aligns with your site’s needs today and can scale for future growth without compromising speed or reliability. Security Measures: SSL Certificates, Secure Servers, and SEO Search engines prioritize secure websites. An SSL certificate not only encrypts data, keeping visitors safe, but also serves as a ranking factor. Secure hosting protects against hacks and malware, which can lead to penalties or even blacklisting by search engines. A secure hosting provider that offers SSL, strong firewalls, and regular backups ensures your site’s security. This reduces the risk of downtime due to attacks and maintains your reputation with both visitors and search engines, supporting your long-term SEO strategy. Bounce Rate, User Experience, and SEO Signals User experience metrics, such as bounce rate and time on site, are indirect ranking signals that search engines use to gauge the value of your content. If your website experiences frequent slowdowns or downtime due to poor hosting, visitors are likely to leave quickly, resulting in a higher bounce rate. This negative engagement signals to search engines that your content may not meet user expectations, which can potentially lower your position in search results. A reliable web hosting service ensures smooth browsing, reducing frustration and helping retain visitors longer, which can improve site signals that contribute to higher rankings. Scalability and Supporting Future SEO Growth As your website gains more traffic from effective search engine optimization, your hosting must be able to handle increased demand. A hosting solution that easily scales ensures your site performance remains strong even during traffic spikes. This prevents slowdowns that could damage your SEO efforts and keep your business from capitalizing on new opportunities. Whether it’s upgrading to cloud hosting, adding resources to your existing plan, or moving to dedicated hosting, choosing the right host ensures your infrastructure never limits your SEO growth. Choosing the Right Hosting Provider for Better SEO Performance Selecting the right web hosting company is a strategic decision that ultimately impacts SEO. Look for a hosting provider that offers high uptime guarantees, fast server performance, robust security protocols, multiple data center options, and responsive customer support. This foundation not only improves technical SEO but also strengthens user trust and supports all your other digital marketing initiatives. The right web host helps you maintain fast loading speeds, a secure website, and reliable
How To Install WordPress Locally
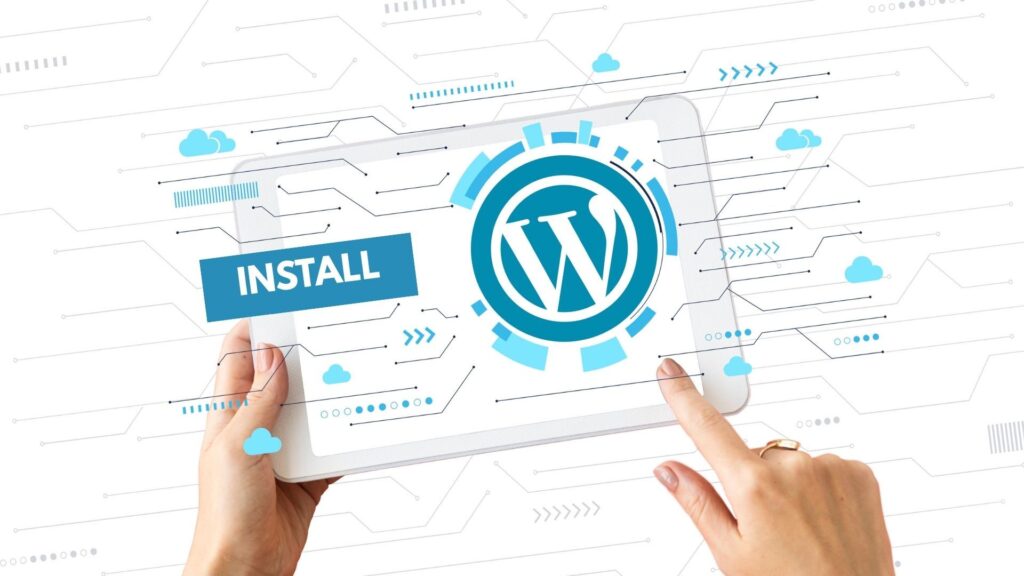
If you want to install WordPress locally on your computer, whether for development, testing, or learning, using a local server environment is the most efficient approach. Many developers and site owners want to install WordPress locally on Windows, Mac, or Linux without relying on a live server. In this article, we’ll walk you through everything you need to know to install WordPress locally, from setting up a local server with XAMPP or MAMP to running the WordPress installation and accessing your local site dashboard. This guide is designed for users on Windows, Mac, or Linux and provides a complete walkthrough for setting up a local WordPress site. Key Takeaways: Installing WordPress locally using tools like XAMPP, MAMP, or LAMP lets you safely develop, test, and customize your site offline across Windows, Mac, and Linux before going live. Setting Up Your Local Server Environment To install WordPress locally, the first requirement is to create a local server environment that simulates how WordPress runs on a live server. XAMPP and MAMP are popular tools that package Apache, MySQL, and PHP into a single installer. These applications allow you to run WordPress on your computer across different operating systems, including Windows, Mac, and Linux. Start by downloading and installing XAMPP or MAMP from their official websites. For Linux users, you can set up a LAMP stack with terminal commands: sudo apt update sudo apt install apache2 mysql-server php php-mysql libapache2-mod-php sudo systemctl start apache2 sudo systemctl start mysql Ensure Apache and MySQL services are running. On Linux, you may also need to set permissions for your web directory: sudo chown -R $USER:www-data /var/www/html sudo chmod -R 755 /var/www/html Alternatively, beginner-friendly tools like LocalWP and DevKinsta provide a graphical interface and automate much of the setup. These are excellent options if you prefer to avoid manual configurations. Download and Extract WordPress Next, download the latest version of WordPress from the official WordPress.org website. Extract the zip file and move the contents into your local server’s root directory. For XAMPP on Windows, this is typically the “htdocs” folder. On Mac with MAMP, it’s often /Applications/MAMP/htdocs. On Linux, it’s usually, /var/www/html. Create a new folder here to store your local WordPress site. This folder will hold all the WordPress files needed for your website to function. Placing the WordPress files in the correct directory ensures they are accessible when you access your localhost in a browser. Create a Database for Your WordPress Website Every WordPress installation requires a database. Open your browser and go to localhost/phpmyadmin to access the MySQL database manager. On Linux, you might access phpMyAdmin through a different local address or manage the database via the command line. Click on “New” to create a database. Choose a name that corresponds with your local WordPress folder for easy reference. This database will store all the information for your WordPress site, including posts, pages, and user data. You don’t need to create tables manually; WordPress will handle that during installation. Run the WordPress Installation Now that your files are in place and your database is ready, open a browser and go to localhost/your-folder-name. This will launch the WordPress installation wizard. Choose your language, enter your database name and username (typically “root”), and leave the password field blank unless you’ve set one during setup. After submitting the details, WordPress will connect to your database and generate the wp-config.php file automatically. If it fails, you will be prompted to create the file manually. Once the database connection is verified, complete the form with your site title, admin username, password, and email, then click on install WordPress. Troubleshooting Common Issues If you encounter issues during setup, here are some quick solutions: Access the WordPress Dashboard When the installation is complete, you’ll see a success message with a login link. Use your admin credentials to access the WordPress dashboard. From here, you can begin customizing your local WordPress site, install themes, add plugins for WordPress, and simulate real-world changes without affecting a live website. Security Note: Although your local WordPress installation isn’t exposed to the internet, you should still use strong passwords, especially on shared or networked machines. This dashboard functions like it would on a live server, allowing you to control your content and settings fully. Testing and Managing Your Local WordPress Site Running WordPress locally is ideal for testing new plugins, exploring themes, and setting up a WordPress multisite if needed. It’s also a safe environment for troubleshooting issues and updating before deploying to a live server. For advanced users, installing multiple local WordPress setups or experimenting with local WordPress development workflows is simple with tools like XAMPP and MAMP. If you’re preparing for managed WordPress hosting, this process ensures your site is ready for migration. Next Steps and Resources Once you’ve successfully set up your local site, consider exploring the next steps: Conclusion Installing WordPress locally is a smart and effective way to build and manage websites in a secure, offline environment. Whether you’re a beginner learning how to install WordPress or an experienced developer testing changes, running WordPress on your local machine using XAMPP, MAMP, or LAMP is an essential skill. Just download WordPress, set up your database, run the installation, and you’re ready to access the WordPress dashboard. Local development with WordPress speeds up your workflow and gives you full control over your site before it goes live.
When Should You Use Lossy Compression For Your WordPress Images?

Image optimization is crucial for building a fast, efficient WordPress site. One of the most effective ways to optimize your images is through compression, which reduces file size without significantly compromising quality. Among the various compression methods available, lossy compression stands out for its high efficiency in shrinking image files. Understanding when to use lossy compression and how it differs from lossless alternatives can dramatically improve your website’s speed and user experience. Key Takeaways: Lossy compression is used on WordPress images to significantly reduce file size by permanently removing non-essential data, commonly applied to blog visuals, product images, and web graphics, where slight quality loss is acceptable. Understanding Lossy Compression Lossy compression is a type of image compression that permanently removes certain data from the original image file to reduce its size. This process can significantly decrease the file size while maintaining acceptable image quality for most web applications. Unlike lossless compression, which retains all original image data, lossy compression discards non-essential information to achieve higher compression ratios. Common lossy image formats include JPEG and WebP, which are widely supported across browsers and platforms. Lossy compression involves a compression algorithm designed to prioritize smaller file sizes over perfect accuracy. As a result, there may be a slight but often unnoticeable difference in quality, especially when viewed on screens with standard resolution. When to Use Lossy Compression You should use lossy compression when the goal is to compress images without needing pixel-perfect quality. This applies to most images in blogs, product galleries, featured headers, and social media previews. These types of images typically benefit from smaller file sizes more than they require perfect fidelity. Applying lossy compression is especially useful on a WordPress site for images that contribute heavily to page weight. For example, uploaded images in JPEG format, automatically compressed by WordPress, can be optimized using compression plugins that apply lossy algorithms for even better performance. When optimizing your product images or blog visuals, lossy compression can help speed up your WordPress site without sacrificing clarity. Benefits of Lossy Compression for WordPress Images The main benefits of lossy compression are faster page load times, reduced bandwidth usage, and improved SEO performance. Smaller image files mean quicker user access, especially on mobile devices or slow connections. This efficiency directly contributes to a better user experience and lower bounce rates. Using lossy compression also improves storage efficiency. Compressing your images reduces your media library’s size, helping conserve server space and improve backup performance. Additionally, many image optimization tools and WordPress plugins support automated lossy compression, making applying this method at scale easy. Lossy compression significantly reduces file sizes, often by more than 70%, making it ideal for situations where the original image quality is not critical. This high compression rate is why lossy compression is the best choice for most general website images. Downsides of Lossy Compression Despite its advantages, lossy compression has some limitations. The most significant downside is the potential loss of image quality. Over-compression can lead to visible artifacts, blurring, and color inaccuracies, especially on images with fine details or text. Another concern is the irreversible nature of lossy compression. Once data is discarded, it cannot be recovered. This makes it unsuitable for image files that require future editing or resizing. Uncompressed images or those stored in a lossless format are better suited for such needs. Lastly, using lossy compression without setting appropriate compression levels can degrade the quality of images, leading to a noticeable difference that undermines visual presentation. Testing and previewing images after compression is essential to maintain acceptable quality. How to Apply Lossy Compression in WordPress WordPress makes it easy to apply lossy compression through various plugins and tools. WordPress plugins like Smush, ShortPixel, and Imagify allow users to automatically apply lossy compression to uploaded images in the WordPress media library. These tools typically let you choose between different compression levels and whether to use lossy or lossless compression methods. For users who want to use lossy compression consistently, configuring the plugin to apply lossy algorithms by default ensures all new uploads are optimized from the start. Moreover, these plugins support batch optimization, making it easy to compress an image or an entire library without manual effort. A reliable image compression plugin ensures your WordPress image optimization strategy remains efficient and consistent. Difference Between Lossy vs Lossless Compression Lossless compression is best for scenarios where preserving the original image quality is non-negotiable, like logos, detailed graphics, and images requiring frequent edits. Lossless image formats, such as PNG, retain all original data but offer lower compression efficiency. In contrast, lossy and lossless compression differ significantly in compression ratio and file size. Lossy compression can reduce file sizes more drastically, often achieving results that lossless compression algorithms cannot match. This makes it ideal for image optimization, where performance is prioritized over exact image reproduction. Best Practices for Using Lossy Compression To maximize the effect of lossy compression, start by choosing the right compression level. Too little compression will not yield performance benefits, while too much can degrade image quality. Always preview compressed images to confirm that the quality remains acceptable. Avoid repeatedly compressing the same image, which can introduce cumulative quality loss. Instead, keep a copy of the original image file for future edits. Also, use compression tools that clearly compare original and compressed images to help you adjust settings precisely. Integrating lossy compression with other optimization strategies, like using a content delivery network (CDN) and responsive images, will help you fully optimize your images and deliver them efficiently across all devices. Conclusion Lossy compression is the best choice for reducing image file sizes on WordPress without noticeably impacting quality. While it comes with some trade-offs, its benefits in terms of speed, storage, and overall performance make it the preferred compression method for most website images. By understanding when to use lossy compression, how to apply it properly, and how it compares to lossless alternatives, you can optimize your images effectively and ensure your WordPress site delivers
