How to Migrate from Webflow to WordPress
Switching from Webflow to WordPress is a common move for individuals and businesses seeking greater control, flexibility, and long-term scalability. While Webflow offers a sleek design interface and all-in-one hosting, WordPress continues to dominate as the world’s most versatile content management system. If you’re ready to make the transition, this guide will walk you through the entire migration process, step by step ensuring a smooth and secure transfer. Key Takeaway: To migrate from Webflow to WordPress, export your CMS content as CSV files from Webflow and import them into WordPress using the WP All Import plugin. Configure permalinks to match your original URLs and update DNS settings to point your domain to the new WordPress site. Understanding the Differences Between Webflow and WordPress Webflow is a visual website builder that combines design and hosting in a single platform. It’s a closed system, meaning you’re tied to its infrastructure, CMS, and pricing model. WordPress, on the other hand, is an open-source platform that gives you full ownership of your site and data. It requires separate hosting but provides far more control over design, functionality, and long-term customization. WordPress also has a much broader plugin ecosystem, making it ideal for growing websites that need advanced features without custom development. Many users migrate to WordPress when they realize they want full freedom to scale their site, integrate third-party tools, or reduce ongoing platform fees. Step 1: Back Up Your Webflow Website Before making any changes, it’s crucial to back up your entire Webflow site. Webflow doesn’t offer a one-click backup or export for dynamic CMS content, so you’ll need to download your static assets manually. Export the HTML, CSS, JavaScript, and images from each page. For dynamic content like blog posts or collections, copy the data into a spreadsheet or document to ensure nothing is lost. If your site uses custom scripts or form settings, note those down for later reconfiguration. Step 2: Set Up Your WordPress Site Before importing any content, you’ll need a WordPress environment ready to build on. Choose a hosting provider that supports WordPress efficiently, ideally with features that save you setup time and reduce technical overhead. If you want a streamlined experience, consider using our Managed WordPress hosting, which comes with WordPress pre-installed, lightning-fast performance, and built-in security. Every plan includes daily backups and free migration, making it an ideal starting point for a clean, worry-free transition from Webflow. Once your hosting is in place, we recommend setting up a staging environment, a private copy of your site where you can test changes safely check out our guide on how to set up a staging. After setup, log in to your WordPress dashboard and take a moment to familiarize yourself with the layout, tools, and content structure. This is where you’ll rebuild and refine your website for launch. Step 3: Export Content From Webflow To move your content from Webflow to WordPress, focus on exporting your dynamic CMS data such as blog posts, project entries, or collections. Follow these steps: 1. Log in to Your Webflow Dashboard: Open the project you’re migrating. Ensure that your content is clean, updated, and ready to be transferred. 2. Export CMS Collections as CSV Files: Navigate to the Collections panel inside the Webflow Designer. Select the collection you want to export for example, blog posts or case studies. Click the settings (gear) icon in the top-right corner, then choose Export as CSV. This will download a spreadsheet containing your content. Repeat this process for each collection you want to move. 3. Document Forms and Custom Scripts: Webflow forms and any embedded scripts are not included in the CSV export. Manually copy your form fields, confirmation messages, and any custom code snippets so you can recreate them in WordPress using form plugins or embed blocks. 4. Organize Your Exported Data: Keep your CSV files and any supporting notes or assets in clearly labeled folders. This will simplify the import process and reduce the chance of missing content during the rebuild. Step 4: Import Content Into WordPress After exporting your CMS collections from Webflow as CSV files, the next step is to import that data into your WordPress site. Since WordPress doesn’t support CSV imports natively, you’ll need to use a plugin to handle the content transfer efficiently. Here’s how to do it: 1. Install the WP All Import Plugin: From your WordPress dashboard, go to Plugins > Add New, search for WP All Import, and install the plugin. Once installed, activate it. The free version is sufficient for importing basic post content. 2. Start a New Import: After activation, navigate to All Import > New Import. Upload your CSV file that you exported from Webflow. The plugin will read the file and show you a preview of the data fields. 3. Select Post Type for Import: Choose whether you’re importing the data as Posts, Pages, or a Custom Post Type, depending on how your content should appear in WordPress. For example, blog articles should be imported as Posts. 4. Map CSV Fields to WordPress Fields: WP All Import will let you drag and drop CSV fields into corresponding WordPress fields, such as post title, content, publish date, categories, and featured image URL. Take your time here to ensure accurate mapping. 5. Run the Import Process: Once everything is mapped, run the import. The plugin will create WordPress posts or pages based on your CSV data. You’ll be able to review and edit the imported content after it’s processed. Step 5: Choose and Install a WordPress Theme Pick a theme that either closely matches your original Webflow design or gives you a clean slate to customize. WordPress offers thousands of free and premium themes, look for one that’s lightweight, responsive, and compatible with the features you need. Once installed, use the WordPress Customizer or a page builder like Elementor to replicate your Webflow layout. Apply global fonts, colors, and header/footer settings to match the original look. Step 6: Configure WordPress Permalinks To avoid
Is Webflow Better Than WordPress?

Choosing between Webflow and WordPress in 2025 is no longer a matter of tradition versus trend, it’s a strategic decision that impacts design workflow, scalability, and long-term maintenance. With the rise of AI-assisted design tools and increasingly capable visual website builders, the landscape has shifted. As businesses and creators seek faster, cleaner, and more flexible ways to build a website, comparing Webflow and WordPress offers valuable insight into which platform truly delivers in the modern era. Key Takeaway: Webflow offers all-in-one pricing with built-in hosting, security, and CMS features, making it simpler to maintain but potentially more expensive upfront. WordPress is free software, but requires separate costs for hosting, themes, plugins, and maintenance, leading to variable long-term expenses. Choose Webflow for ease and integrated features; choose WordPress for flexibility and deep customization. Webflow and WordPress Today Webflow is a visual web platform that allows users to design, develop, and publish responsive websites without writing complex code. It combines CMS functionality, hosting, and SEO tools in one cohesive environment. By contrast, WordPress is an open-source system that supports over 40% of websites on the internet. It offers near-limitless flexibility, but this often depends on external plugins and themes to match functionality found natively in platforms like Webflow. In 2025, both platforms continue to evolve. Webflow introduced new AI-powered design features and performance enhancements. WordPress, now in its 6.x generation, has improved its Gutenberg editor and native block features, but it still requires plugin support to meet most modern website design and SEO needs. Design Interface and Visual Building Experience Webflow’s design interface is purpose-built for pixel-perfect control. It mimics a real development environment visually, with access to responsive layouts, interaction triggers, and custom animation without direct coding. Users can edit structure and styling as they would with HTML and CSS, all from a clean dashboard. WordPress has closed the gap with tools like Elementor and Gutenberg, but these often require multiple plugins to achieve what Webflow offers by default. The visual experience in WordPress is improving, but it remains fragmented, depending on the theme, builder, or plugin used. Customization, Plugins, and Integration Flexibility Compared to WordPress, Webflow emphasizes built-in features over external add-ons. While it doesn’t support a traditional plugin model, it allows integrations via APIs, embeds, and third-party services like HubSpot or Google Analytics. For projects requiring advanced features, custom code in HTML, CSS, or JavaScript can be injected directly. WordPress thrives in extensibility through its massive ecosystem. Thousands of WordPress plugins and themes are available for nearly every function, including ecommerce, SEO, performance optimization, and more. However, using too many plugins can introduce bloat, affect site speed, and increase long-term maintenance. Functionality and Plugin Dependency WordPress websites rely heavily on plugins to achieve full functionality. Whether it’s a contact form, on-page SEO, or ecommerce features like WooCommerce, you’ll need to install and configure multiple tools. This approach allows deep customization but adds complexity. Webflow includes much of this functionality out of the box. For smaller sites and portfolios, Webflow eliminates the need for separate tools to manage design, CMS, SEO, and forms. This streamlined setup reduces development time and keeps the project structure clean. SEO Tools and Optimization Capabilities Webflow offers SEO features that are tightly integrated into the platform. You can set custom meta titles, descriptions, redirects, and canonical tags from the dashboard. The clean, semantic code structure improves crawlability and performance. WordPress can be optimized for SEO using plugins like Yoast or Rank Math. These tools provide extensive control but require configuration and regular updates. While powerful, this dependency means more components to manage and troubleshoot. Hosting, Security, Performance, and Scalability Webflow includes hosting as part of its service. It uses a global CDN and AWS infrastructure, delivering fast page loads and enterprise-grade security without additional setup. Everything from SSL to backups is automated. WordPress gives you full freedom to choose a hosting provider. However, this means you’ll need to manage performance optimization, security, and scaling manually or through plugins. With the right setup, a WordPress site can scale effectively, but it requires ongoing oversight and technical expertise. Accessibility and Mobile Experience Both platforms support responsive design, but Webflow makes mobile optimization more intuitive through its visual interface. Designers can adjust styles per breakpoint, ensuring a seamless experience across devices. Accessibility tools like ARIA labels and keyboard navigation are easier to implement visually in Webflow. WordPress accessibility depends heavily on the theme and plugin ecosystem. Some themes prioritize mobile responsiveness and accessibility, while others require manual intervention or coding. As of 2025, improvements have been made, but consistency still varies site to site. Ease of Use and Learning Curve Webflow is designed to make it easy to design and build without traditional coding. The dashboard is unified, and users can control styling, layout, and CMS functions from one place. However, those unfamiliar with front-end concepts may still face a learning curve. WordPress is more accessible for beginners with no design experience, but it often becomes complex once customization is needed. Setting up a new blog or brochure site is fast, but building your site with unique features may require hiring a developer or learning how plugins interact with themes. Cost and Long-Term Maintenance Considerations Webflow follows a transparent pricing model that includes hosting, CMS features, security, and updates. As of 2025, plans range from $14 to $39 per month for standard websites and $29 to $212 per month for ecommerce. While not free, these rates cover most essential features and reduce the need for extra services or licenses. WordPress itself is free, but total costs vary depending on setup. Shared hosting can start at $3/month, while managed plans may exceed $60/month. A domain name typically adds $10–$20/year. Premium themes often cost $30 to $100, and custom development can reach $10,000+. Plugins range from free to several hundred dollars annually, especially for ecommerce features or SEO tools. WordPress sites also require regular updates, backups, and performance monitoring. These tasks may be handled in-house or through managed services,
Best Caching Plugins for WordPress
Website speed is more than just a technical metric; it directly influences user experience, search rankings, and overall business success. For WordPress site owners, improving load times is essential to keep visitors engaged and achieve scalability as traffic grows. Among the various performance tactics, caching stands out as one of the most effective ways to accelerate your website. In this blog, we explore some of the best caching plugins available for WordPress, highlighting their key features and helping you determine which tool fits your website’s unique needs. Whether you’re managing a personal blog or a high-traffic online store, understanding and leveraging caching can transform your site’s responsiveness and reliability. Key Takeaway: The best caching plugins for WordPress significantly improve site speed by storing static content and reducing server load. WP Rocket, W3 Total Cache, and LiteSpeed Cache are top choices, each offering unique features tailored to different user needs, from beginners to developers. Proper caching not only enhances performance but also boosts SEO and mobile user experience. What Is a Caching Plugin and Why Is It Important in WordPress? A caching plugin is a utility that stores static versions of your web pages and serves them to visitors, instead of regenerating them from scratch each time someone lands on your site. WordPress, by nature, builds pages dynamically by pulling data from the database, applying PHP code, and rendering it for the user. This process can be resource-intensive, especially under heavy traffic. By storing ready-made versions of your pages, it cut down on processing time, reduces server load, and improves user experience. This leads to faster page rendering, lower bounce rates, and improved SEO rankings. Understanding the Different Types of Caching in WordPress Here’s a breakdown of the main types of caching you’ll encounter: Key Features to Look For Before selecting a caching solution for your site, it’s important to understand which features truly matter. A good caching plugin should offer page and browser caching at a minimum. Other valuable features include cache preloading (which builds cached pages automatically), GZIP compression for smaller file sizes, mobile-specific optimization, integration with content delivery networks, and database cleanup tools. Ease of configuration and compatibility with your hosting setup are also crucial, especially if you’re not a developer. WP Rocket: Premium Performance with Simplicity WP Rocket stands out as a premium tool that simplifies the performance optimization process. Unlike many free alternatives, it activates key performance features right out of the box. Once installed, WP Rocket automatically applies page and browser caching and GZIP compression. It also includes lazy loading for images, database optimization, and CDN integration without requiring additional plugins. One of its strongest advantages is its beginner-friendly interface. It’s designed for users who want real results without having to configure dozens of settings. For website owners who value time and reliability, WP Rocket delivers a noticeable improvement in performance with minimal effort. W3 Total Cache: Full Control for Advanced Users If you need complete control over every aspect of caching, W3 Total Cache is one of the most powerful free options available. It supports all major caching types, including object and opcode caching, and is compatible with advanced configurations like Redis or Memcached. W3 Total Cache is ideal for developers or site owners who are comfortable with technical settings. It allows fine-grained control over minification, CDN integration, fragment caching, and more. The interface isn’t the most intuitive, but the depth of customization makes it a go-to option for complex WordPress installations or enterprise-level performance tuning. LiteSpeed Cache: Free Plugin with Server-Level Speed LiteSpeed Cache is a standout tool for websites hosted on LiteSpeed servers. It offers server-level caching, which is significantly faster than plugin-level solutions that rely on PHP. The plugin is free, but its full potential is unlocked when running on LiteSpeed-powered hosting. This solution supports all common optimization tactics, including image compression, database cleanup, browser caching, and HTTP/3. Its integration with QUIC.cloud also brings smart CDN capabilities to the table. For users with access to LiteSpeed hosting, this plugin delivers unmatched performance gains without the complexity. Check out our step-by-step guide on configuring LiteSpeed Cache for optimal performance. WP Super Cache: Reliable Simplicity from Automattic Developed by Automattic, the team behind WordPress.com, WP Super Cache is a reliable tool that focuses on delivering static HTML files to users. Its primary appeal lies in its simplicity; its setup is straightforward, and it works well on shared hosting environments. The plugin offers three modes: Simple (recommended for most users), Expert (for developers comfortable editing .htaccess files), and WP-Cache (for dynamic pages). It doesn’t offer the bells and whistles of other tools, but for users who want reliable performance without added features, WP Super Cache remains a dependable choice. Cache Enabler: Lightweight and Minimalist Solution Cache Enabler is perfect for site owners who want an efficient, lightweight tool without a steep learning curve. Developed by KeyCDN, this plugin offers basic yet effective page caching and supports WebP image format delivery for improved image performance. It integrates well with CDN services and includes an automatic cache expiry system, making it ideal for blogs or smaller business websites that prioritize speed and simplicity over deep configuration options. While not as feature-rich as others, its lightweight design makes it a strong choice for lean WordPress setups. Plugin Pros and Cons Comparison Plugin Key Features Pricing Ease of Use Ideal For WP Rocket Automatic caching, lazy loading, database cleanup Paid (starting at $59/year) High Non-technical users, e-commerce websites W3 Total Cache Page, object, database caching, CDN support Free, Pro ($99/year) Medium Developers, high-traffic sites LiteSpeed Cache Server-level caching, QUIC.cloud CDN, image optimization Free High Sites on LiteSpeed hosting, global audiences WP Super Cache Static HTML caching, simple setup Free Very High Beginners, shared hosting environments Cache Enabler Lightweight page caching, WebP support Free Very High Small websites, blogs, or sites needing minimal setup Common Misconceptions One frequent mistake is using multiple caching plugins at once, assuming it will multiply the performance benefits. In reality, this can cause
How To Add a Canonical Tag In The Header Of WordPress
Search engines value unique content, but WordPress websites often generate multiple URLs pointing to the same page. This leads to duplicate content issues, which can dilute your site’s SEO authority. A canonical tag helps prevent this by telling search engines which version of a page should be treated as the original. Adding a canonical tag in the header of your WordPress site is a practical step toward maintaining clean indexing and protecting your search visibility. Key Takeaway: To add a canonical tag in WordPress, place a tag inside the section of your site’s HTML. This can be done using an SEO plugin, by editing the header.php file, or by hooking into wp_head() in functions.php. Correct implementation prevents duplicate content and improves SEO indexing accuracy. Understanding Canonical Tags A canonical tag is an HTML element placed in the header of a webpage that signals to search engines which URL should be considered the authoritative source when multiple variations of that page exist. WordPress, by design, can produce various URLs for the same content through categories, tags, pagination, and archives. Without a canonical directive, search engines may divide ranking signals across these versions or index the wrong one entirely. To ensure the canonical tag functions properly, it must be located inside the section of the HTML. This is where search engine crawlers look for metadata during the initial page scan. Placing the tag elsewhere on the page reduces its effectiveness and can result in search engines ignoring it. Correct placement is not just a best practice, it’s a requirement for proper canonicalization. Adding Canonical Tags Using SEO Plugins The most efficient method to handle canonical tags in WordPress is by using a reliable SEO plugin. Tools like Yoast SEO, Rank Math, or All in One SEO automatically generate and insert canonical tags based on your site’s permalink structure. Steps to add canonical tags using Plugins: 1. Install and activate the plugin: Go to your WordPress dashboard, navigate to Plugins > Add New, and search for Yoast SEO or Rank Math. Click Install, then Activate. 2. Open the page or post you want to edit: Navigate to Posts or Pages, and click Edit under the content you want to modify. 3. Scroll to the SEO settings section: Below the content editor, locate the SEO plugin’s settings panel. 4. Find the Canonical URL field: Look for the advanced SEO settings section in your plugin. There should be a field labeled Canonical URL where you can enter your preferred link. 5. Enter your desired canonical URL: If you want to override the default, paste the preferred URL into the field. Leave it blank to let the plugin auto-generate the canonical tag. 6. Update or publish the page: Click Update or Publish to save your changes. The canonical tag will now be included in the page’s header. This example uses Yoast SEO, but the process is nearly identical in Rank Math and All in One SEO you’ll find similar options for setting the canonical URL in the page’s SEO settings panel. Manually Adding Canonical Tags to the Header.php File If you want to manually control canonical tags across your WordPress theme, editing the header.php file gives you direct access to the HTML <head> section. This method is best suited for developers or those comfortable modifying theme files. Steps to manually add canonical tags: 1. Create a Backup: Never edit the header section without a safety net. Create a full backup of your site before making any changes. Check out our guide on creating a WordPress backup. 2. Navigate to Appearance > Theme File Editor: In your WordPress dashboard, go to Appearance > Theme File Editor and select header.php from the file list. 3. Locate the section: Find the opening <head> tag in the header.php file.Add the following code inside the <head> section:<link rel=”canonical” href=”<?php echo get_permalink(); ?>” /> 4. This dynamically generates the current page’s URL. 5. Click Update File: Save your changes by clicking Update File at the bottom of the editor. Using wp_head() Hook in Custom Themes or Functions For more flexibility, especially in custom themes or when building advanced logic, you can use the wp_head() hook to inject canonical tags via the functions.php file. Steps to add canonical tags using the wp_head() hook: 1. Open your theme’s functions.php file: Navigate to Appearance > Theme File Editor and select functions.php. Add the following code snippet to your theme’s functions.php file: function add_custom_canonical_tag() { if (is_singular()) { echo ‘<link rel=”canonical” href=”‘ . get_permalink() . ‘” />’ . “\n”; } } add_action(‘wp_head’, ‘add_custom_canonical_tag’); 2. This ensures the canonical tag is only printed on singular content types like posts or pages. 3. Click Update File: Save the file and exit the editor. Testing and Validating Canonical Implementation After implementing canonical tags, whether through plugins or manual code, it’s essential to verify they’re functioning correctly across your site. Steps to test and validate canonical tags: 1. Open the page in your browser: Right-click and select View Page Source. 2. Search for the canonical tag: Use your browser’s find tool (Ctrl+F or Cmd+F) and search for rel=”canonical” to locate the tag. 3. Check the URL value: Ensure the canonical URL matches the intended version of the page. 4. Use SEO audit tools for site-wide checks: Run a crawl using tools like Screaming Frog, Ahrefs, or Google Search Console. These will show canonical coverage and highlight missing or conflicting tags. 5. Review special cases: Pay attention to paginated archives, filtered pages, and category URLs where canonical conflicts often occur. Common Mistakes to Avoid An incorrect canonical implementation can do more harm than good. Avoid assigning canonical tags that point to the wrong URL or to non-canonical pages like filtered search results or temporary redirects. Using multiple plugins that inject canonical tags can also create conflicts, resulting in duplicate tags or contradictory directives. Another frequent oversight is ignoring canonicalization for paginated content, such as blog archives or ecommerce product listings. Failing to configure these properly can cause indexing problems and
How to Configure LSCache in WordPress
A slow-loading WordPress site can frustrate visitors, negatively impact your search rankings, and consume unnecessary server resources. LSCache, a caching solution designed for LiteSpeed web servers, tackles these issues by storing and serving optimized versions of your pages in milliseconds. But installing the plugin is only half the job; unlocking its full potential requires careful configuration. In this guide, you’ll learn how to set up LSCache in WordPress, fine-tune its settings, and combine it with optimization tools and a CDN for maximum speed and performance. Key Takeaway: To configure LSCache in WordPress, install and activate the LiteSpeed Cache plugin, enable caching in the Cache tab, set appropriate TTL values, and enable mobile caching if your theme serves different layouts. Optimize images, configure page and file optimization, exclude dynamic pages from caching, and integrate QUIC.cloud CDN for faster global delivery. Installing LSCache for WordPress Click Install Now, then Activate once the installation is complete. If you already have another caching or optimization plugin (like WP Rocket, W3 Total Cache, or Autoptimize), deactivate it first. Running multiple caching plugins can cause conflicts and lead to slower speeds or broken layouts. Verifying Your Site Is Being Cached Once the plugin is active, it’s important to verify that LSCache is actually working. Open your site in a browser, right-click anywhere on the page, and select “Inspect” to launch the developer tools. In the Network tab, refresh the page and select the main document request — usually your domain name. In the Headers section, look for the line X-LiteSpeed-Cache: hit. A “hit” confirms the page was served from cache, while a “miss” means it wasn’t cached yet. If no cache header appears, check your LiteSpeed server configuration and ensure no other plugin is overriding cache settings. Configuring Core Cache Settings Open LiteSpeed Cache → Cache → Cache in your WordPress dashboard. Start by enabling Enable Cache to activate caching site-wide. If logged-in users need personalized content, such as members or students on an e-learning site, enable Cache Logged-in Users and Cache Commenters. For most sites, it is best to leave these off to avoid showing outdated or incorrect data. Keep the Cache Login Page disabled to prevent login and session issues. If your site relies heavily on the REST API, you can enable the Cache REST API to improve performance; however, turn it off if the data changes in real-time. Adjust the Default Public Cache TTL, which controls how long cached pages are stored before being refreshed. A setting of 3600 seconds (1 hour) works well for most websites. You can also set values for Private Cache TTL and Front Page TTL for more control over specific content.If your theme serves different layouts or content for mobile devices, enable Cache Mobile so each device type receives the correct version. Use Drop Query Strings to ignore specific URL parameters, allowing those pages to be still cached. Managing Cache Purging Options Use the ‘Purge All’ or ‘Purge by URL’ buttons for manual control when testing changes. This ensures that visitors always see the latest version without having to clear the entire cache unnecessarily. Excluding Specific Pages or Content from Caching Some pages should never be cached because they rely on real-time updates: To exclude them: Page and File Optimization Techniques Beyond caching, LSCache offers page optimization tools. Enable these options in Page Optimization and test each change individually to avoid breaking site layout or functionality. Image Optimization with LiteSpeed Large, unoptimized images can still slow down a cached site. LSCache’s image optimization feature compresses images without noticeable quality loss and converts them to the modern WebP format, resulting in smaller file sizes. In Image Optimization, request compression for your existing media library and enable automatic optimization for all future uploads. Activating WebP Image Replacement ensures supported browsers receive these lighter images automatically. Integrating QUIC.cloud CDN with LSCache For faster content delivery worldwide, connect LSCache to QUIC.cloud. In the CDN tab, request a QUIC.cloud domain key and map your site’s static files to the CDN. This ensures visitors load cached assets from servers geographically closer to them, reducing latency and improving global performance. Conclusion Configuring LSCache in WordPress is a crucial step toward achieving faster load times, enhanced site performance, and an improved user experience. By properly installing the plugin, verifying its operation, and fine-tuning caching and optimization settings, you ensure that your website can handle increased traffic more efficiently while supporting SEO goals through reduced server response times. Remember to regularly test your site’s performance and clear caches after changes to maintain optimal results. With careful configuration and ongoing monitoring, LSCache becomes a valuable tool that helps your WordPress website run smoothly and effectively in today’s competitive digital landscape.
How To Create a Divi Child Theme

Customizing your WordPress site with the Divi theme is powerful, but making changes directly to the core theme files can risk losing your hard work during updates. That’s where a Divi child theme comes in, a safe, reliable way to tailor your site’s design and features without worrying about future updates overwriting your customizations. In this guide, you’ll learn exactly how to set up a Divi child theme step by step, ensuring your modifications remain secure and your site remains uniquely yours. Key Takeaway: Creating a Divi child theme allows you to safely customize your WordPress site without losing changes during updates to the Divi parent theme. It involves setting up a child theme folder, adding a style.css file, and linking it to the parent theme. Using a child theme ensures your customizations are preserved and easily managed. What Is a Divi Child Theme and Why Use It? A Divi child theme is a sub-theme that inherits all the functionality of the Divi theme, but allows you to override and extend it without modifying the core theme files directly. The key benefit of using a child theme for Divi is that it allows you to customize the theme without risking your changes being overwritten when Divi updates. When you make changes to a WordPress theme directly, those changes are stored in the parent theme files. However, when the parent theme is updated, all of your modifications can be lost. With a child theme, the updates to the parent theme will not affect your customizations, as the child theme’s files (such as the style.css file and functions.php) are separate from the core theme files. This means that using a child theme is the safest and most efficient way to customize Divi while ensuring that your changes remain intact during future theme updates. Setting Up a Divi Child Theme: The Essentials Before diving into the process of creating a Divi child theme, it’s important to understand the basic structure. You will need to create a child theme folder in the theme directory of your WordPress site, where you will store the child theme’s stylesheet (style.css) and the functions.php file. The parent theme (Divi) will remain intact, and the child theme will extend it. The child theme folder will contain two essential files: Step-by-Step Guide to Creating a Divi Child Theme Step 1: Create the Child Theme Folder The first step in creating a child theme for Divi is to create a new folder in the wp-content/themes directory of your WordPress website. You can name the folder something like divi-child to keep things clear. Inside the child theme folder, you will store the style.css and functions.php files. Be sure to create a folder structured correctly, as WordPress will need it to recognize the child theme properly. Step 2: Add the style.css File In the newly created child theme folder, create a file named style.css. This file is essential because it provides WordPress with the necessary theme information. Here is an example of what you should include in the style.css file: /* Theme Name: Divi Child Theme Template: Divi Author: Your Name Author URI: https://yourwebsite.com Theme URI: https://www.elegantthemes.com/gallery/divi/ Description: A child theme for Divi Version: 1.0 */ /* Add your custom CSS below */ The Template line must match the folder name of the parent theme (in this case, Divi). The style.css file is also where you can begin adding custom CSS to modify the appearance of your site. Step 3: Create the functions.php File Next, create a functions.php file inside the child theme’s folder. This file is used to add PHP functions and personalization. The most important function you’ll need in this file is one that tells WordPress to load the parent theme’s stylesheet. Here’s the code to add: <?php function divi_child_theme_styles() { wp_enqueue_style( ‘divi-parent-style’, get_template_directory_uri() . ‘/style.css’ ); } add_action( ‘wp_enqueue_scripts’, ‘divi_child_theme_styles’ ); This code ensures that the Divi parent theme’s stylesheet is loaded before your child theme’s stylesheet. Without this, your child theme would not inherit the styles from the Divi theme. Step 4: Upload the Child Theme to WordPress Once the child theme folder is created and the necessary files are added, you’ll need to zip the folder and upload it to your WordPress site. To do this: Once the theme is activated, you will be able to customize it using the Divi Builder, apply custom CSS, and make modifications to the functions.php file. Customizing the Divi Child Theme Now that your child theme is set up, you can begin customizing your Divi theme. You can: Alternative Method: Using a Plugin to Create a Child Theme If you prefer not to manually create a Divi child theme, you can use a plugin like Child Theme Configurator. This free plugin simplifies the process, automatically generating the necessary style.css and functions.php files. It’s an excellent option for those who want to quickly set up a child theme without needing to touch the code. The plugin guides you through setting up a child theme, from creating the folder to uploading the theme. It’s a great way to speed up development time and ensure your customizations remain intact during Divi updates. Conclusion Creating a Divi child theme is a crucial step for anyone who wants to customize their WordPress site using Divi. It allows you to make modifications without affecting the core Divi theme files and ensures that your changes won’t be lost when the parent theme is updated. By following this step-by-step guide, you can easily create a child theme for Divi, add custom CSS, and take full advantage of Divi’s powerful builder. Whether you’re using PHP or relying on the Child Theme Configurator plugin, using a child theme is a great way to safely and efficiently customize your WordPress theme.
How to Implement AMP on WordPress
Delivering a lightning-fast, mobile-friendly website is now essential for reaching and retaining visitors, primarily due to Google’s mobile-first indexing, which drives modern SEO. Accelerated Mobile Pages (Google AMP) enables WordPress site owners to deliver instant-loading pages on mobile devices by optimizing HTML, CSS, and JavaScript. In this comprehensive guide, you’ll discover the practical steps to implement AMP on WordPress, whether you prefer using official plugins, customizing your code, or leveraging powerful third-party tools. By the end, you’ll be equipped to boost your site’s speed, improve your search rankings, and enhance the mobile experience for every visitor. Key Takeaway: Implementing AMP on your WordPress site improves mobile loading speed and enhances search visibility in Google. Use the official AMP plugin for a quick setup, or customize manually for greater control, ensuring all AMP pages pass validation for compliance and performance. Understanding AMP and Why You Need It Accelerated Mobile Pages is an open-source initiative created by Google to speed up the loading time of web pages on mobile devices. Simplifying content and utilizing optimized HTML, CSS, and JavaScript enable faster load times, enhance SEO rankings, improve user experience, and reduce bounce rates. Implementing AMP pages on your WordPress website has several key advantages. First, it boosts page speed, which is crucial for SEO. Faster pages enhance the user experience by reducing bounce rates and keeping users engaged for longer periods. Moreover, AMP-enabled pages are prioritized in Google search results, providing an edge in mobile search rankings. By implementing Accelerated Mobile Pages on your site, you enhance its performance, particularly for mobile users, which gives you a competitive advantage in SEO and helps attract more site visitors. Implementing AMP Using the Official AMP Plugin for WordPress The official AMP WordPress plugin is the easiest way to use AMP pages on your WordPress site. This method requires minimal configuration, making it an ideal solution for non-technical users who need a straightforward approach. After installing the plugin, you can configure it from the AMP settings page in the WordPress dashboard. The plugin automatically generates mobile-optimized pages for your posts and pages, allowing you to adjust the settings according to your specific needs. You can also choose whether to include pages for custom post types, like blog posts or product pages, depending on how you want to display AMP content across your site. Manually Implementing AMP (Without a Plugin) For those seeking more flexibility and control over their AMP pages, manually implementing it might be the best option. This method is ideal for developers or advanced users who are comfortable working with code and need more customization than what a plugin offers. To manually apply AMP, you’ll start by creating custom AMP templates within your WordPress theme. This involves replacing standard HTML tags with AMP-specific tags such as <amp-img> for images and <amp-video> for videos. Additionally, ensure that the CSS and JavaScript used in your templates are compatible with the AMP framework. AMP restricts certain JavaScript and imposes limitations on how CSS can be used, so it’s crucial to follow these rules for the pages to be compliant. After creating and customizing your AMP templates, it’s essential to validate them to ensure they are implemented correctly. You can use tools like the AMP Validator or Google Search Console to check for any errors or issues that require attention. While this approach provides more customization and control, it also requires more technical knowledge and time, making it best suited for users who are comfortable with web development. Using a Child Theme to Add AMP Support If you’re looking to customize AMP pages while maintaining your original theme’s design and functionality, using a child theme is a great solution. A child theme allows you to modify the AMP version of your site without affecting your main WordPress theme. This method is beneficial if you want to adjust the appearance of your pages or add custom functionality, such as custom fonts, CSS styles, or specific templates. To get started, you’ll need to create a child theme. Begin by creating a new folder in the wp-content/themes directory and adding a style.css file that imports the styles from the parent theme. You’ll also need a functions.php file to enqueue the styles of the parent theme properly. After setting up the child theme, you can copy and modify specific templates from the parent theme, like single.php or page.php, to make them AMP-compatible. You can also create AMP-specific styles in the child theme’s style.css file, targeting AMP pages using the amp class in the body tag. For example, you may want to adjust the layout or font size specifically for mobile devices. Using Third-Party Tools for AMP Creation If you’re looking for a quicker, more automated way to create AMP pages, third-party tools like AMP for WP can simplify the process. These tools allow you to easily convert your existing pages into AMP-enabled versions without needing to dive into code. Installing plugins like AMP for WP can automatically generate AMP versions of your posts and pages, offering pre-built templates that are ready to use. To implement this method, start by installing and activating the AMP for WP plugin through the WordPress admin panel. After activation, you can access the plugin’s settings to customize the design and layout of your pages. The plugin also supports integrating essential features, such as Google Analytics, social sharing buttons, and compatibility for custom post types. However, while these tools provide a fast setup, they do have limitations in terms of customization. Advanced design elements or highly interactive content might not always work as expected with third-party tools. Once the plugin is set up, you can track your AMP pages’ performance using Google Analytics, or you can test the pages with the AMP Validator to ensure they’re AMP-compliant. Additionally, Google Search Console will alert you to any issues, enabling you to resolve them promptly. Optimizing AMP Pages for Better Performance To get the most out of AMP, it’s crucial to continually optimize your AMP pages for performance.
How To Enable Application Passwords in WordPress
Application passwords in WordPress provide a secure way to connect third-party apps and services to your site without exposing your main login credentials. They allow tools such as publishing assistants, automation platforms, or mobile apps to interact with WordPress using unique credentials tied to a user profile. While the feature is available by default in WordPress 5.6 and later, some setups may require additional steps or plugins to enable it. Key Takeaway: Application passwords in WordPress allow secure connections between your site and third-party apps through the REST API. If the option is missing, ensure your site runs WordPress 5.6 or higher, the REST API is enabled, and consider using plugins like Application Passwords Manager or WP Application Passwords to restore the feature. What Are Application Passwords in WordPress? Application passwords are a type of authentication method that allows external applications to connect to your WordPress site through the REST API. Unlike your regular login details, these passwords are generated for specific apps and can be revoked at any time without affecting your main account. This means you don’t have to share your personal username and password with every tool that integrates with WordPress. Instead, you create an application password, assign it to the app, and manage it independently. For example, content automation software or external publishing apps can use an application password to post articles directly to your site without needing your primary credentials. Prerequisites Before Enabling Before enabling application passwords, make sure the following conditions are met: If these conditions are not met, the application passwords section will not appear in your user profile. You can find more details in WordPress’s official documentation. Enabling Application Passwords by Default If your site meets the prerequisites, you can generate an application password directly from the WordPress dashboard. Navigate to Users → Profile and scroll to the Application Passwords section. Assign a descriptive name for the app you are connecting to, then select Add New Application Password. WordPress will display a randomly generated password only once. Copy it and store it securely, because it cannot be retrieved again. The password is then entered into the external application when prompted for WordPress authentication. From that point on, the app can interact with your site through the REST API without using your main credentials. What to Do If Application Passwords Are Missing Sometimes, the option does not appear even if you are on WordPress 5.6 or higher. This can happen for several reasons: In these cases, plugins can restore or enhance the feature. Examples include: Installing and activating one of these plugins ensures the option appears in your profile, allowing you to generate passwords for third-party integrations. Managing and Revoking Application Passwords Each password should be labeled according to the app it belongs to. Clear naming helps track which applications are currently connected and prevents confusion when revoking access. If you stop using an app, delete its password immediately from your profile. Revoking access in this way does not affect your other integrations or your primary login credentials. Security Best Practices Application passwords should be treated with the same level of care as API keys. They grant direct access to your WordPress site, so secure handling is essential. Following these practices keeps integrations secure while minimizing risk. Troubleshooting Common Issues If application passwords still do not appear or function correctly, check for these common problems: For further details and technical guidance, consult WordPress’s official support documentation. Conclusion Application passwords in WordPress offer a secure and flexible way to connect third-party apps, automation tools, and publishing platforms to your site. By generating unique credentials tied to your user profile, you can safely integrate external services without compromising your main login details. If your site is running WordPress 5.6 or higher, the feature should be available by default. If it is missing, enabling it through a plugin ensures the same functionality. Managing passwords carefully, revoking them when no longer needed, and following security best practices ensures both convenience and strong protection. With proper setup, application passwords provide a straightforward and reliable method for WordPress authentication.
Divi Vs Elementor – Which Page Builder Is Better?

Building a professional WordPress website no longer requires coding skills, thanks to powerful page builders. Among the many options available, two popular page builders dominate the conversation: Elementor and Divi. Both tools have transformed how users design websites, offering drag-and-drop editors, theme customization, and advanced design features. The question most users ask in 2025 is straightforward: Divi vs Elementor, which page builder is better? Key Takeaway: Divi is better for long-term value with its lifetime pricing, built-in split testing, and Divi AI, while Elementor is better for beginners with a free version, intuitive interface, and strong third‑party integrations. The best choice depends on whether you prioritize cost efficiency over time (Divi) or flexibility and ease of use (Elementor). Ease of Use and Interface The interface of a page builder can determine how quickly users adapt to the platform. Elementor primarily operates with a sidebar editor, offering a live preview as changes are applied. This Elementor interface appeals to beginners who prefer a structured workflow. The free version of Elementor provides access to essential widgets, allowing you to build a simple WordPress website at no cost. Divi, on the other hand, takes a more immersive approach with its visual builder. Instead of working from a side panel, the Divi builder lets users edit directly on the page. Both Elementor and Divi offer real-time editing, but Divi’s approach feels more immersive because changes are applied directly to the layout, rather than through a sidebar preview. However, the learning curve can be steeper compared to Elementor. Users who choose to use the Divi builder benefit from a highly customizable design environment, but mastering it takes practice. Design Flexibility and Templates Design freedom is where both builders excel, but in slightly different ways. Elementor templates provide a vast library of pre-built landing pages, page templates, and full-site designs. Elementor Pro unlocks advanced options like a popup builder, custom headers, and theme builder tools. For users trying to decide between Elementor Free and Pro, the premium version significantly expands creative possibilities. In addition, there is a large ecosystem of third-party plugins built specifically for Elementor, giving users even more opportunities to extend functionality and customize their websites. Divi provides equally strong design flexibility through the Divi theme and Divi Theme Builder. Its library of layouts covers a wide range of niches, while Divi also offers global design settings for brand consistency. Unlike Elementor, Divi added features like the popup builder later. Divi and Elementor offer strong customization options, making it challenging to choose between them solely based on design flexibility. Features and Unique Capabilities Beyond templates, each builder plugin distinguishes itself with unique features. Divi uses advanced modules and recently integrated Divi AI, allowing users to generate text, images, and layouts automatically. Divi provides a split test feature for optimizing landing page performance, which is invaluable for marketers. Divi works seamlessly across different WordPress websites and is constantly updated with new tools. Elementor also offers AI functionality, with Elementor AI integrated to help generate text and code. Pro Elementor templates provide users with professional-grade designs, while Elementor offers third-party developers opportunities to expand the ecosystem with add-ons. Compared to Elementor, Divi often emphasizes built-in solutions, whereas Elementor also offers flexibility through its plugin ecosystem. Performance and Speed Performance is often a deciding factor when choosing a page builder for your website. Divi vs Elementor performance tests in 2025 show that Elementor builder tends to produce lighter code, resulting in faster load times. However, performance varies depending on hosting and optimization practices. Divi uses shortcodes, which some argue can slow down a WordPress website when deactivated. Still, the Divi team has made performance a priority, with significant speed improvements in recent versions of Divi. When using the Divi theme builder effectively, websites can perform well with proper caching and optimization. Builders like Beaver Builder and page builders like Elementor are also in the discussion, but Divi and Elementor remain the two most popular page builders that most users compare. Pricing and Plans Elementor offers a free version with useful features for building simple WordPress websites. To access its full capabilities, Elementor Pro has four paid tiers: Essential at $59 per year for one site, Advanced at $99 per year for up to three sites, Expert at $199 per year for up to 25 sites, and Agency at $399 per year for up to 1,000 sites. All paid plans include the same Pro functionality, such as the theme builder, popup builder, WooCommerce builder, and more than 50 premium widgets, differing only in the number of licensed sites. Divi takes a different approach with its pricing. The standard annual plan costs $89 and includes the Divi Theme, Divi Builder, and layout packs. The Divi Pro Plan is $277 per year and adds Divi AI, Divi Cloud, and premium support through Divi VIP. For long-term value, Divi also offers lifetime access: a one-time payment of $249 for the basic package or $277 for the Pro bundle with AI and cloud services. While Elementor is easier to start with, thanks to its free version and flexible annual plans, Divi is cheaper in the long run for users who want lifetime access and bundled advanced features. Choosing between Divi and Elementor comes down to whether you prefer scalable annual pricing or a single lifetime investment. Integrations and Ecosystem When looking at a page builder plugin and ecosystem support, Elementor plugin integrations are unmatched. Elementor highlights its compatibility with WooCommerce, membership plugins, and marketing tools. Elementor primarily operates with third-party extensions, giving it flexibility as a website builder. Divi and Elementor offer strong ecosystems, but Divi provides more built-in features, reducing reliance on external plugins. Capabilities of the Divi builder include split testing, AI features, and design packs. Divi and Elementor together cover nearly every possible use case in the WordPress website market. Using Astra with Elementor is a common setup, but using the Divi theme achieves similar results without relying on additional themes. Choosing the Right Page Builder Choosing a
Do You Need a Content Delivery Network for WordPress?
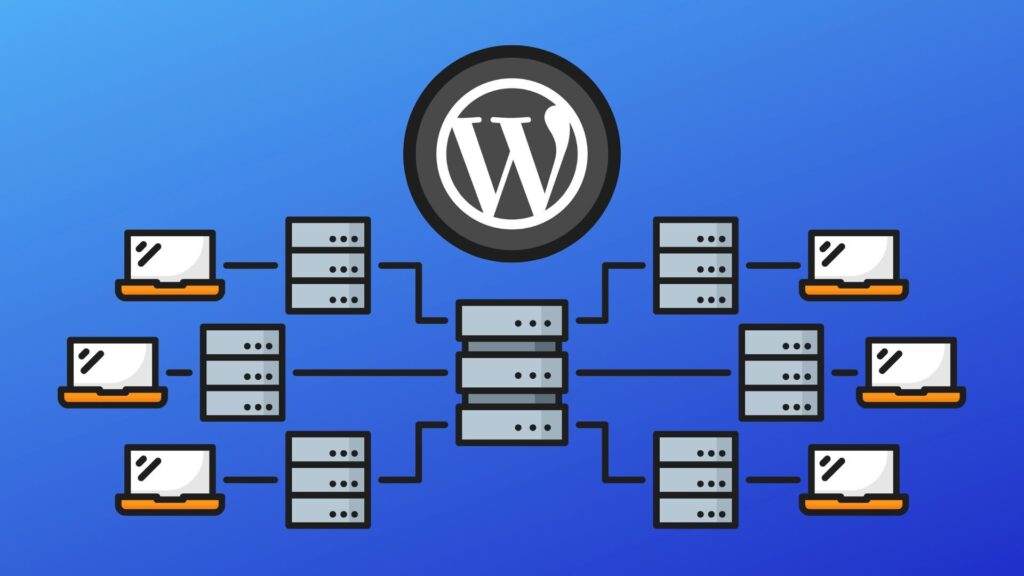
If you manage a WordPress site, you’ve likely come across the term content delivery network or CDN. With increasing attention on website speed, performance optimization, and user experience, many site owners wonder: Do I really need a CDN for my WordPress website? The short answer is, it depends. This article will guide you through how it works, the benefits it offers, and how to determine whether a CDN is right for your site. Key Takeaway: A content delivery network improves WordPress site speed, reduces server load, and enhances security. It is recommended for sites with high traffic, global audiences, or media-heavy content. Smaller, local sites with low traffic may not require one immediately. How CDNs Work with WordPress A CDN, short for content delivery network, is a global network of servers that work together to deliver content to users from the server closest to them. Instead of relying on a single server or origin server, it stores copies of static files, such as images, CSS, and JavaScript, across multiple data centers. When someone visits your site, the CDN helps ensure your website content, especially static content, loads quickly by pulling it from the server closest to the user. For a WordPress website, this means less strain on your hosting server, faster load time, and smoother performance. CDNs work alongside your existing hosting plan, not as a replacement, and can be easily integrated through a WordPress plugin or external CDN service. Key Benefits a CDN Provides to WordPress Websites Utilizing a CDN can significantly enhance your site performance. Since it reduces the distance data has to travel, it results in faster load times, particularly for global visitors. This type of optimization enhances both the user experience and your site’s search engine ranking. A faster WordPress site can have a direct impact on your SEO, bounce rates, and conversion metrics. A CDN also helps manage traffic spikes by distributing the load across a network of servers, thereby reducing the risk of slowdowns during periods of high activity. If you’re running a popular website, especially one with rich media or video content, it ensures consistent performance for all website visitors. Another critical benefit is security. A CDN provides features that help protect your website from threats, such as DDoS attacks. Some CDNs, such as Cloudflare, offer built-in security features, including firewall rules, bot mitigation, and Secure Sockets Layer (SSL) integration, to protect your WordPress site from malicious traffic. When a CDN Might Be Essential for Your WordPress Site You likely need a CDN if your site meets certain criteria. For instance, if you have a self-hosted WordPress site with a global audience, it can significantly reduce delivery times and ensure consistent access, regardless of the user’s location. Sites that rely heavily on static files, images, or video also benefit from a CDN, as it can serve that content faster and more efficiently than a single server could. If you’re using WordPress for eCommerce, online education, or media publishing, it becomes essential to accelerate the delivery of website content and maintain smooth performance during traffic spikes. Additionally, if your hosting plan has limited bandwidth or struggles under load, integrating a CDN like Cloudflare can offload traffic, reduce server costs, and provide a more scalable infrastructure. When You Might Not Need a Content Delivery Network? While the advantages of using a CDN are clear, some WordPress site owners may not see a measurable difference. If your audience is local, your site is light on media, and you’re hosted on a high-performance managed WordPress service, you might not immediately benefit from using a CDN. In such cases, your site already loads quickly, and introducing unnecessary complexity might be counterproductive. Some features might overlap with built-in hosting optimizations or caching tools you’re already using. Additionally, low-traffic personal blogs or development environments typically don’t require an extra layer of protection. Even if the impact isn’t immediately noticeable, adding a CDN is a smart move that can only help in the long run. CDN Integration with WordPress: What It Takes If you decide your site would benefit from a performance boost, the integration process is simple. Many services offer setup through WordPress plugins, and some hosting plans include built-in support. One of the most trusted names in the industry is Cloudflare, the largest and most widely used content delivery platform globally. At WBS, we eliminate the complexity of manual setup and third-party plugins. Our Hosting services come with fully integrated Cloudflare, the industry’s most trusted and best CDN provider, giving your WordPress site an instant advantage in speed, security, and global delivery. Getting started typically involves connecting your site, choosing which content should be cached and distributed, and adjusting performance preferences. Thanks to intuitive dashboards and automation, most users can activate these features without needing technical expertise. Conclusion So, do you need a content delivery network for your WordPress site? If you’re aiming for faster load times, stronger SEO, better performance, and added protection, especially for a growing or global audience, the answer is likely yes. Offloading traffic from your origin server and distributing your content through a global network can make a measurable difference in speed and reliability. However, if your site is local, low-traffic, and already optimized with solid hosting and caching, adding a delivery network may not be urgent. That said, understanding how these systems work and keeping the option open as your site scales is a smart move. Whether or not you implement one should come down to your site’s needs, not trends. Focus on what enhances performance, fosters growth, and provides a better experience for your visitors.
